 New Player Help
New Player Help aims to assist newcomers to the fifth installment in the Monster Hunter series or newcomers to the series as a whole.
Tips for entry level players can be found throughout the wiki, and we recommend you read the following pages as well:
- Tips and Controls for documentation helpful to new Hunters
- Multiplayer for information on connecting to other Hunters through online service
- Combat, Weapon Mechanics, Defense, and Elemental Resistances for information on combat with Monsters and a rundown of core combat mechanics
- Monsters for a list of all creatures found in the field, including Large and Small Monsters, Endemic Life, and Pets
- NPCs for a list of all major characters you will encounter in the New World, including their locations and Quests
- Locations and Environment and Hazards for information on the Locales in which you will be hunting
- Items, Weapons, Armor, Charms, and Mantles for lists of all types of Equipment available to Hunters
- Skills for a list of all Skills that will give Hunters the edge in combat with Monsters
- Loadouts for information on configuring a complete and efficient Hunter's arsenal
- Augmentations and Upgrades for information on improving your Weapons and Armor
In the setting of Monster Hunter World, you take on the role of a Hunter who has just arrived at Astera, a community established for the purpose of exploring and researching the New World. Your goal as a Hunter is to take on Quests for Astera's residents and Reseach Commission, which in turn will lead you to acquiring new and better gear with which to take on more Quests.
In general, gameplay follows a pattern of:
- Accepting a Quest from an NPC in need or choosing a Quest on your own
- Preparing for your Quest by assembling Items, Armor, and Weapons of your choice
- Embarking on your Quest and completing its objective, which often centers around hunting down Large or Small Monsters
- Returning to Astera and using gathered Material Items to fashion new Items, Armor, and Weapons.
This newbie guide covers various details within this core gameplay. Additionally, jump to The Game Screen or Singleplayer & Multiplayer for more information on the field HUD or Online Sessions.
MHW Newbie Guide
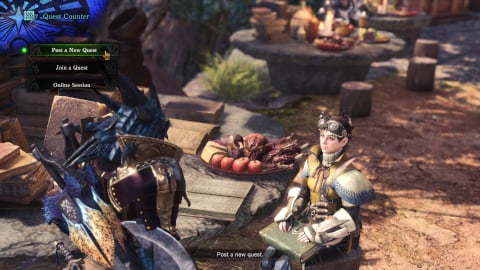
Taking on a Quest
The Handler; Hunter Rank
Preparation for a Quest
Weapon Selection; Assembling Equipment; The Canteen
Embarking / The Hunt
Locations; Campsites; Supply Box;
Tracking; The Slinger; Environment; Specialized Tools; Capturing; Carving
Using Materials
Equipment Forging / Crafting / Upgrading
Taking on a Quest
The Handler
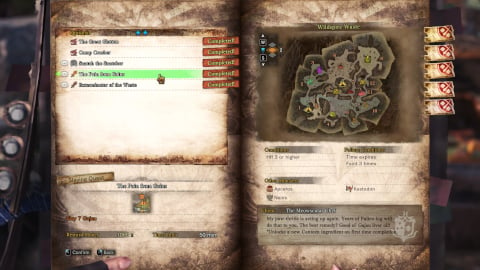
Over the course of the Story, you will often obtain Quests via your Handler, who will display Optional and Assigned Quests in detail. Quests in Monster Hunter World have a time limit (usually 50 minutes), and are failed if the timer runs out or if the player faints by running out of Health too many times (usually 3). Other failure conditions are also active depending on the objective.
All Quests will display trivia information about the client, and provide details on the Hunter Rank requirement, destination, the main Monsters to hunt as well as the rewards on offer for completion. Hunters can use this information to plan ahead.
Quests may also be accepted from the Quest boards at Astera's Tradeyard and Workshop or the Hub Lass and Arena Lass at Astera's Gathering Hub.
Hunter Rank
A Hunter's Rank serves as a measure of their experience and prevents them from accepting Quests that may be too difficult for them. At first, Hunter Rank is directly controlled by the sequence of the Story. Later on, Hunters will have to work their Rank up to take on some Quests. Raising Hunter Rank is simply a matter of going on more Quests; a handful will award more points toward Rank than usual.
Preparation for a Quest
Selecting a Weapon Type
Your first choice will be your Weapon. All Weapons will help you survive combat with Monsters, but some require more skill to use than others. You can try out every Weapon type in Astera's Training Area, accessible from the Map.
If you are new to Monster Hunter but familiar with other action games, the most recognizable fighting styles can be found in the Sword and Shield, Bow, Dual Blades, and the Long Sword. There is no penalty to swapping to a different Weapon, and you do not need special Equipment to use one at any time; simply try new things.
Ingame information on each Weapon Type can be accessed from the Start Menu under Info.
These are newbie-friendly overviews of the different Weapon categories.
Weapon Training
You can test out Weapons at the Training Area, to do this, talk to your Housekeeper in your house and select Training Area.
Try out each Weapon's attacks and techniques by attacking different objects within the training area. To switch to a different Weapon, choose one from the Item box.
All types of Bowgun Ammo and Bow Coatings are available for testing. Additionally, Items and Ammo/Coatings will not be consumed.
See Weapon Mechanics for information that will help with advanced Weapons testing.
Use the Control Guide accessed through Start Menu > System tab > Options > Game Settings tab. This will display available moves at all times.
In addition, the Weapon Controls section of the Field Guide accessed through Start Menu > Info tab > Hunter's Notes will give an overview of moves that can be performed with every Weapon type.
Assembling Equipment and Items
A Hunter needs more than a Weapon to find success during a hunt. The other pieces of Equipment available are:
- Armor, which reduces both Physical and Elemental Damage through Defense and Elemental Resistance stats. Armor also grants points towards useful Skills
- Decorations, which are slotted into Decoration Slots in Armor to grant more points towards Skills
- Charms, which serve as another source of points toward Skills
- Specialized Equipment, which can be deployed in the field to assist in hunts through recovery, Damage reduction, offensive boosts, and more
- Palico Equipment, which changes the Damage type and Resistance stats of your Palico
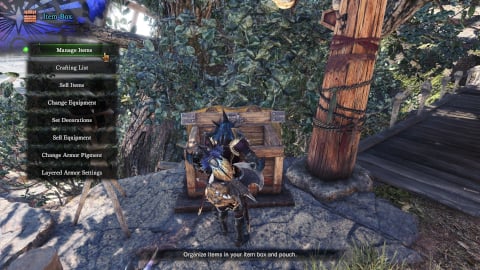
While at any Item Box in Astera, these Equipment pieces can be switched out. In addition, Item Boxes allow Hunters to equip and save Loadouts to use later.
Also consider Augmentations and Upgrades, which increase the effectiveness of Weapons and Armor, and Bowgun Modifications, which can be used to customize how a Light or Heavy Bowgun handles in combat. These can only be changed at Astera's Workshop.
In addition to Equipment, a Hunter must carefully consider the Items they bring to a hunt. Some Items have general uses such as recovery, while others have specialized applications which will help with one or two of the many scenarios in which a Hunter may find themselves. There are several Fixed Items that remain in the Item Pouch and on the Item Bar at all times: The Capture Net, the BBQ Spit, the Whetstone for Blademasters, Normal Ammo 1 for Gunners, and Close-range Coating for Bow wielders.
Like Equipment, Items can also be configured and saved as Loadouts for efficient customization.
The Canteen
The Canteen is a facility where you can eat meals that boost your Health, Stamina, and other stats. Meals also grant you the benefits of Food Skills.
You can eat a meal either in Astera or out in the field by sitting down at the Canteen. Eating meals provide various temporary Skills and Status Effects.
In addition to providing meals, the Canteen can also oven-roast Items that Hunters supply. Depending on the Item or Monster Material provided, oven-roasting can result in Nutrients, Catalysts, Herbal Medicine, Gunpowder, Rations, and Well-Done Steaks. Simply select "Oven Roast" and choose an applicable Item; bronze-colored result icons indicate Rations, while silver indicates bonus Items. After at least one Quest the results can be retrieved.
Embarking on a Quest
Locations
Every Quest will take place in one of the Locations of the New World. Knowing how to navigate and prepare for each Location will improve a Hunter's performance.
At any time, the Map can be found in the Field Guide accessed from the Start Menu. The Map will display the location of each Hunter and points of interest, as well as Monsters which the Hunter has successfully tracked.
Campsites
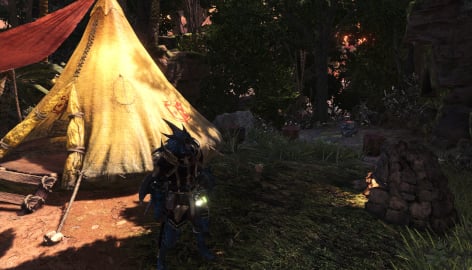
Each Location has two or more Campsites that allow a Hunter to fast-travel across the map, eat a Meal, or change their Equipment.
Inside the tent, a Hunter can change their and their Palico's Equipment.
Entering the tent will restore their Health and the Health of their Palico, while also clearing any Abnormal Statuses.
While not in combat, a Hunter can use the Map - accessed with ![]() / M or the PS4 Touch Pad - to select a Campsite and fast-travel to it. Additionally, the Farcaster can be used to travel to the nearest Campsite while in combat, allowing for a quick getaway from dangerous situations.
/ M or the PS4 Touch Pad - to select a Campsite and fast-travel to it. Additionally, the Farcaster can be used to travel to the nearest Campsite while in combat, allowing for a quick getaway from dangerous situations.
When travelling to a new Location for the first time, only one Campsite will be available. A Hunter must discover potential areas for more Campsites and set them up by delivering the required materials to the Resource Center in Astera.
Supply Box
The Supply Box is an in-the-field resource for your Items as you arrive at the hunting destination. There is a variety of Supply Items here based on the Location or Quest objective. Make sure to stock up!

Preparing for the hunt is as important as performing
The Hunt
Scoutflies and Tracking
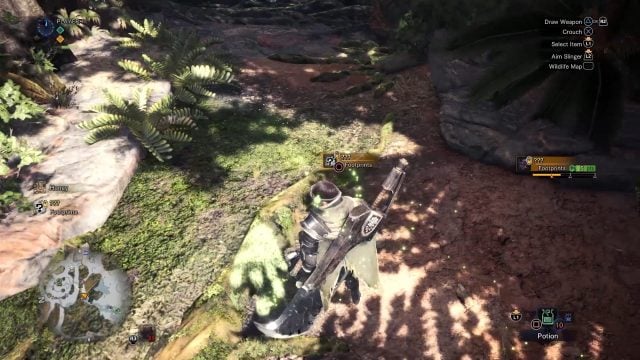
Scoutflies respond to Monster traces and many other substances in the Environment. If you feel lost in a new Locale, follow your Scoutflies to discover points of interest as you grow accustomed to your surroundings.
By examining the tracks of Large Monsters, your Scoutflies will pick up on the Monster's trail, leading you to more traces of the Monster. Follow your Scoutflies as you collect traces to head towards the Monster's location.
Depending on your surroundings, Scoutflies will react to various objects and lead you to them. If you want to your Scoutflies to focus on a specific target such as a Monster or Item-gathering point, press ![]() to open up your wildlife map, highlight the target and press
to open up your wildlife map, highlight the target and press ![]() to set it as your waypoint.
to set it as your waypoint.
Keep in mind that Scoutflies will hide when you are engaged in combat with a Monster.
The Slinger and Slinger Ammo
The Slinger is a multipurpose support tool that serves all kinds of uses out on a hunt. You can load Stones and Pods found out in the field to fire as projectiles, and even use it as a grappling hook in certain situations.
The Slinger is part of the standard gear for Hunters of the Research Commission. They resemble small crossbows attached to the left arm, and can shoot stones, knives, ropes, and the Capture Net. In addition, the Slinger is used by Hunters to grapple across gaps and access higher or lower levels.
Hunters can use the Slinger to do many things, such as distracting and damaging Monsters, triggering Hazards, mobility and assisting teammates.
You can only use your Slinger when your Weapon is sheathed, with the exception of the Sword & Shield.
Taking Advantage of Your Environment
Utilizing the Environment can give a Hunter the edge while in the field. There are may ways to make use of one's surroundings:
By crouching in brush, a Hunter can hide from Monsters to avoid or escape combat. Monsters will still be able to spot a Hunter in certain cases. Make sure you have a good grasp of your surroundings!
Some parts of the environment, such as dams and suspended boulders, can be triggered with the Slinger or Monster attacks to alter the environment and cause damage.
There are certain flora and insects that provide immediate effects upon interaction. Some can assist a Hunter with recovery or special effects; for example, Vitalilies will replenish Health, and Flashflies emit a bright flash of light that can temporarily blind Monsters. Other environmental elements provide hazards for both Hunters and Monsters, and may require preparation to avoid or utilize. See Environment and Hazards for more information.
Using Specialized Tools
Specialized Tools activate powerful effects for a set amount of time. Equip them from the Item Box, and use them on Quests by selecting them form the Item Bar.
The Ghillie Mantle, for example, will temporarily camouflage you from Monsters.
You can check the effects of any Specialized Tools you have equipped from "Equipment Info" in the Start Menu.
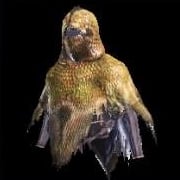 |
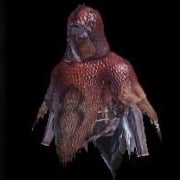 |
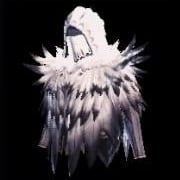 |
| Vitality Mantle | Fireproof Mantle | Evasion Mantle |
Capturing
Capture Quests require you to weaken the Monster, trap the Monster, and use a Tranquilizer to capture the Monster alive. Once you've successfully snared a Monster in your trap, select a Tranq Bomb from the Item Bar and use it to throw it at your target. Once the Monster is asleep, you've captured it! You can also use Tranq Ammo when you're using a ranged Weapon.
Early in the Story you will learn how to Capture a Monster. You will need a Shock Trap or a Pitfall Trap and some Tranq Bombs, Tranq Ammo, or Tranq Knives.
While caught in a Trap, a Monster can be captured if it is an a Weakened state - denoted by this ![]() symbol on the minimap. Using two Tranq Bombs, Tranq Knives, or Tranq Ammo rounds is enough to capture any Monster, before or after it is caught in a Trap. Note that the effect of each Tranq Item wears off after several seconds.
symbol on the minimap. Using two Tranq Bombs, Tranq Knives, or Tranq Ammo rounds is enough to capture any Monster, before or after it is caught in a Trap. Note that the effect of each Tranq Item wears off after several seconds.
Capturing a Monster will complete either a Hunt or a Capture objective for it and result in a few more Quest rewards to compensate for the inability to gather Materials from its body.
Once placed on the ground, a Trap can be removed by approaching it and interacting with it; this will destroy the Item. If a Trap is not triggered or remove for five minutes after being deployed, it will disappear.
Material Carving
Once the hunt is done, you have 1 minute before you are automatically removed from the area and returned to the world hub. You should use this time to harvest materials from the slayed Monster: these are later used for crafting and Upgrades. If you happen to be in an Expedition there will be no time limit.
The manner by which you defeat the Monsters plays a role on the loot you get. Wounding the animal such as tail-cutting or creating a limp on its legs can give you additional rewards after the Quest.
Using Gathered Materials
Equipment Forging / Crafting / Upgrading
Give the Materials you earn as Quest rewards or carve form Monsters to the Smithy to create new Equipment for taking on even tougher Monsters.
At the Smithy, Hunters can upgrade and augment Equipment using the materials they have found and harvested in the field. Each Weapon and Armor has upgrade paths that can be followed; this is the key to becoming a more powerful and efficient Monster Hunter. Use the Wishlist feature to track which Weapons/Armor you want to upgrade and the game will let you know when you have the necessary materials to complete the craft.
You will also be able to create different sets of Armor from the various Monsters you defeat. These choices are a significant portion of the fun of the game, and can present a difficult choice between fashion and efficiency!
See Loadouts for more information on customizing your arsenal.
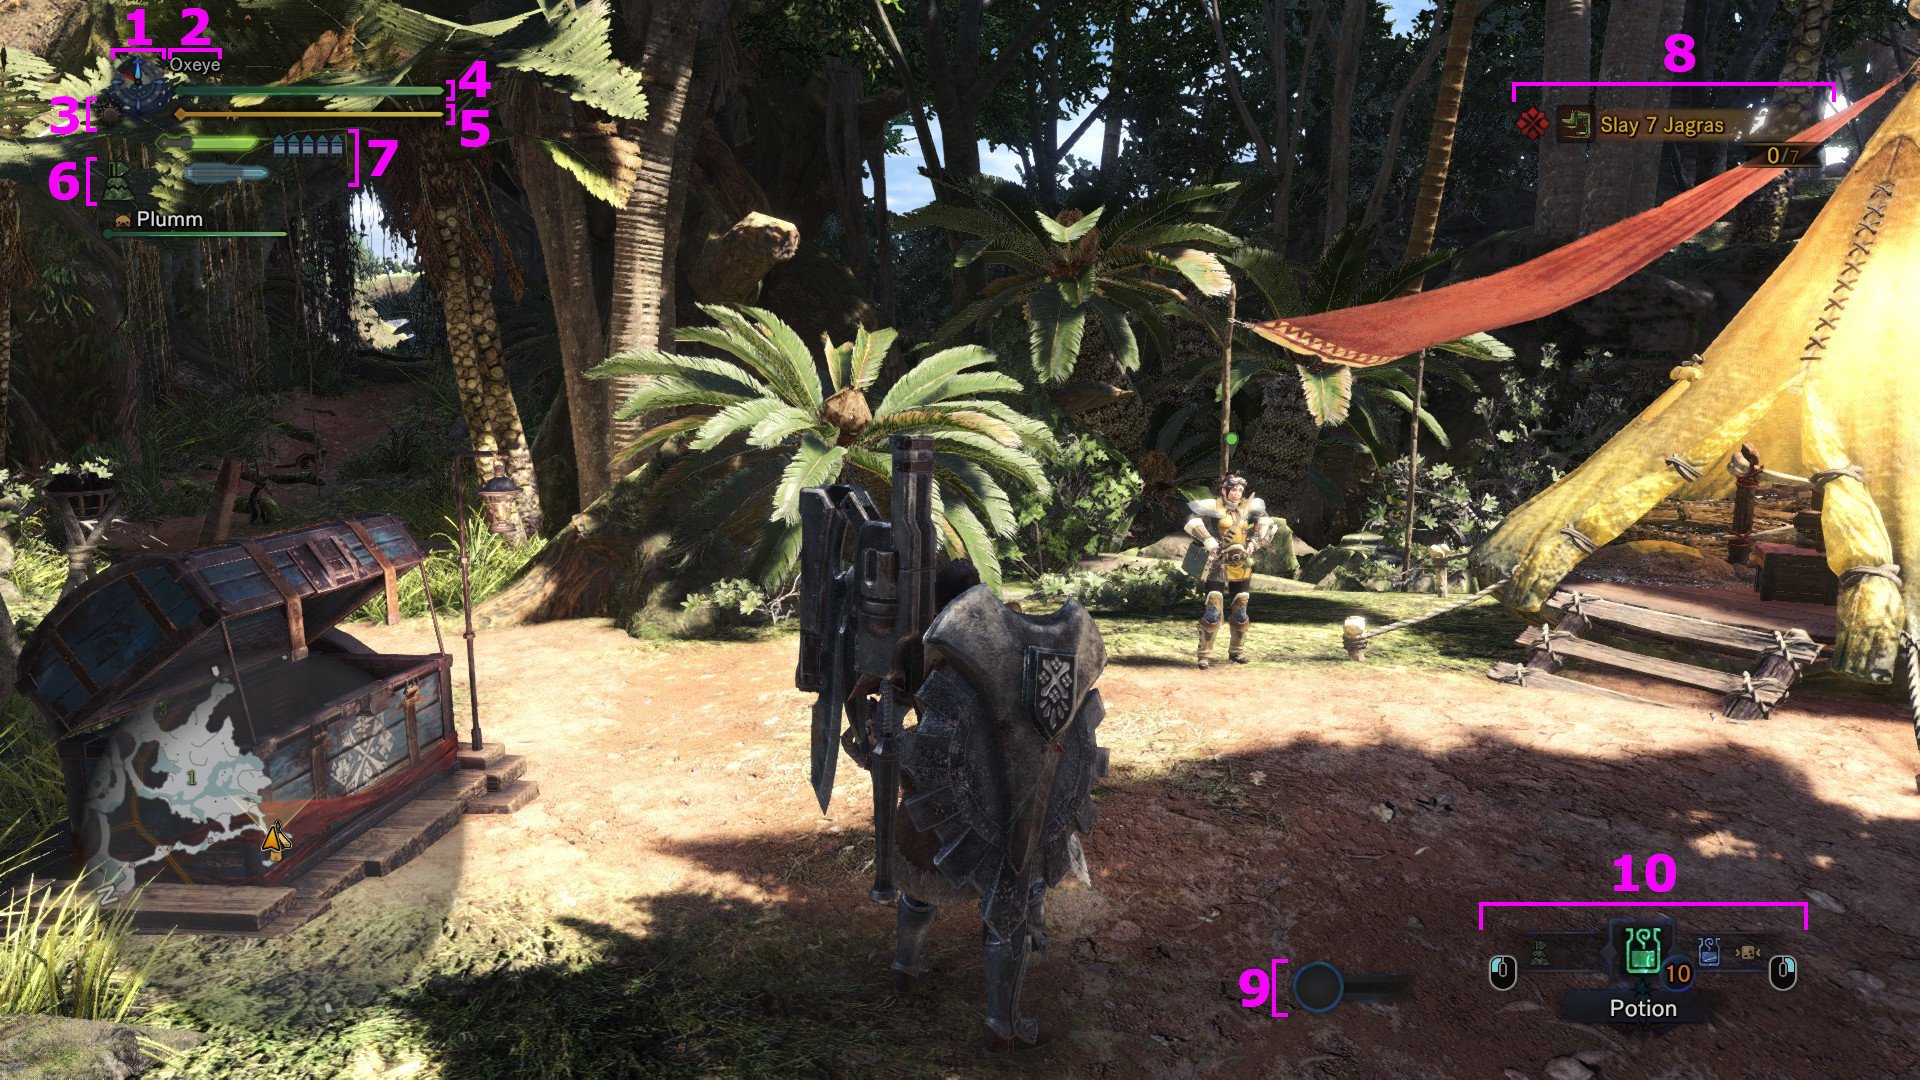
The Game Screen (In the Field)
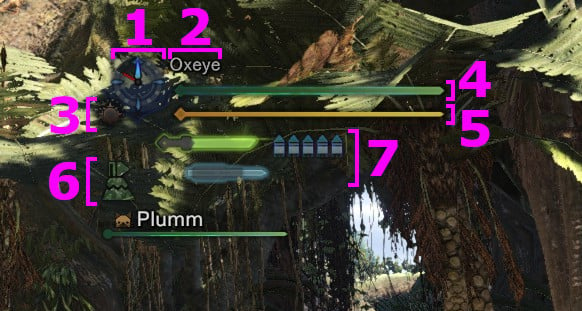
1. Time Limit
This is the time limit for the Quest. The blue hand indicates the time remaining. If the blue hand reaches the mark indicated by the red hand, time is up and the Quest ends in failure.
2. Your Name
This shows your character's name.
3. Day/Night Display
The sun icon indicates daytime, and the moon icon indicates nighttime.
4. Your Health
This shows your character's Health. This gauge is usually minimized, but will expand automatically depending on your combat status.
Your character will Faint if the green portion of the gauge completely runs out. After taking damage, a portion of the gauge will remain red, and will recover automatically over time.
5. Your Stamina
This shows your character's stamina. This gauge is usually minimized, but will expand automatically depending on your combat status.
Your character will use stamina while dashing or performing certain kinds of attacks. The amount of stamina consumed also varies under certain conditions. For example, less stamina is consumed out of combat than in combat.
Stamina refills over time, but the gauge's max value also shrinks periodically over long stretches of time. You can boost your stamina gauge's max value by eating well-done steaks and similar Items.
6. Specialized Tools
This shows which Specialized Tools you have equipped, as well as their current availability or cooldown state.
See Mantles for more information.
7. Weapon Information
This displays your Weapon's current Sharpness level, indicated by color. Depending on the Weapon type you have equipped, this will also display relevant gauges and charges.
See Sharpness for more information.
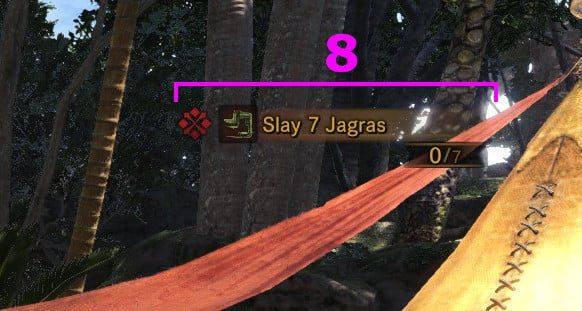
8. Quest Information
The objectives of some Quests will be displayed here.
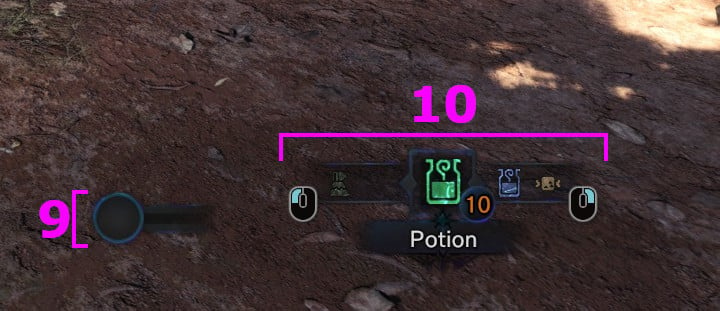
9. Slinger Ammo
This displays the current count and type of Slinger Ammo you have equipped. Slinger Pods from the Item Bar will overwrite any Ammo you picked up from the environment until it is unequipped using the Item Bar.
10. Item Bar
This displays the currently selected available Item from your Item Pouch. The selection can be Scrolled while traversing or using your Weapon.
See Items for more information.
Singleplayer and Multiplayer
Single Player
To play by yourself, it is as simple as picking a Quest and setting the max players to 1. If you never want to play with others, you can choose to never join an online session in the options menu. Although if you want to play with others make sure to turn back on this setting.
Select Your Equipment
You can change your gear at any Item box in Astera or any tent while in the field.
Depart on the Quest
Once your preparations are complete and the Quest has finished loading, you can go to any Quest gate to embark on your Quest!
Multiplayer
Unless you have it set otherwise, Monster Hunter World will always try to put you into an online session with other players. You have several ways to choose what session to join, and they are as follows.
Matchmaking
The game will try to find the best match for you, and if none exists, it will put you in your own session.
Creating your own session
This option will create your own session, and allow you to set its search Criteria. These include things like player experience, Hunter Rank, Quest types, and more.
Searching by Criteria
This allows you to search for sessions matching certain criteria; things like player experience, Hunter Rank, Quest types, and more. After searching, you will be presented with a list of all sessions that met the criteria, allowing you to pick the one you want to join.
Searching by Session ID
Search for a session by using its unique ID. The ID is a random bunch of letters and numbers that is case-sensitive.
Squad Session Search
A quick search option that will show you every session that one of your squad members have joined. More Information: Squads
Joining Others on Quests
Once in a session, there are two ways to play with others. Joining a Quest and SOS flares.
To join a Quest, simply pick that option on the Quest board and join a Quest hosted by someone else in the session. You can also host a Quest by choosing to do a Quest and leaving the max players on 4.
SOS flares are the other option. You can use a flare from the menu while out on a Quest, and if you do, it will allow other hunters to join you. You can also respond to SOS flares from choosing said option from the Quest board. Note: SOS flares ignore what session you are in. This means that everyone will be able to see a flare that you use, and you can see every flare used by others.
Communicating during Quests
Chat and Gestures
You can use text and stickers in chat, or make use of a variety of gestures to communicate during Quests.
Voice Chat
You can turn in-game voice chat on or off with the following methods:
1. Title Screen Menu > Options > Audio > Voice Chat
2. Start Menu > System > Options > Audio > Voice Chat
3. Start Menu > Player List
 Anonymous
can someone tell me why my health is so incredibly low? I get 3 shot by diablos in max odogaron armor and my health bar is about 70 pixels long, ik its not supposed to be that small so how can i get it bigger

 Anonymous
the fire proof mantle's picture is wrong the picture is the ice proof mantle

 Anonymous
Having quite a lot of trouble joining my friends game on the xbox one, keep getting error messages after it times out. Anyone else having this issue?

 Anonymous
 Anonymous
 Anonymous
 Anonymous
 Anonymous
"You will also be able to create different looks for your Armor depending on your choices during upgrades."
I thought upgrading youre armor doesn't affect the Looks but only the stats.
 Anonymous



dooont casre
1
+11
-1