Environmental Components and Hazards are special parts of Locales in Monster Hunter World (MHW); these can be endemic plants and animals, or parts of the terrain. They present either a dangerous scenario or a helpful tool for Hunters when tracking, capturing or defeating monsters in specific areas, and should be considered when preparing for a hunt.
There are myriad endemic creatures and points of interest in the environment that will help you on hunts. You can see where and what they are by checking your map.
Each useful part of the Environment has a different effect. Some Components and Hazards can be triggered by Hunters for traps or recovery, while others are passive and require preparation from Skills, Specialized Tools, or Items to overcome or utilize.
The Environment and Hazards
The following is a list of Environmental Components and Hazards. Some hazardous creatures, also known as Endemic Life, can be captured and kept as Pets. For additional information on these creatures, see their individual pages.
Vitalilies
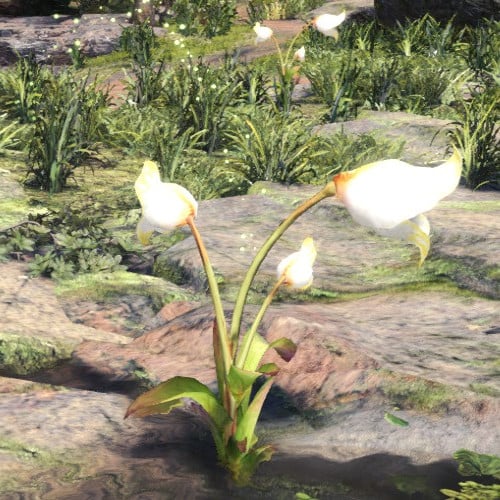
Vitalilies are plants that release a curative nectar when struck. This nectar restores the Health of anyone that touches it.
Vitalily can be recognized by its white bell-shaped flower. Areas with Vitalily usually have two or three plants, allowing a team of Hunters to maintain Health through a long fight. They can be triggered up close or at range with Weapons or Slinger Ammo.
Flashflies
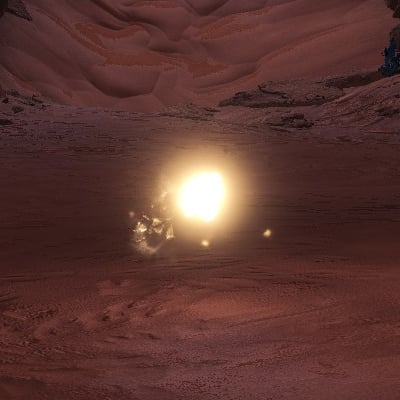
When struck, Flashflies emit a flash of light that can stun Monsters. The flash is stronger when more Flashflies are stuck at once.
Flashfly Hazards, separate from the Flashbug Material Item, appear as a cluster of bright insects. They can be triggered up close or at range by a Weapon or Slinger Ammo to make an escape or stop a large attack.
Sporepuffs
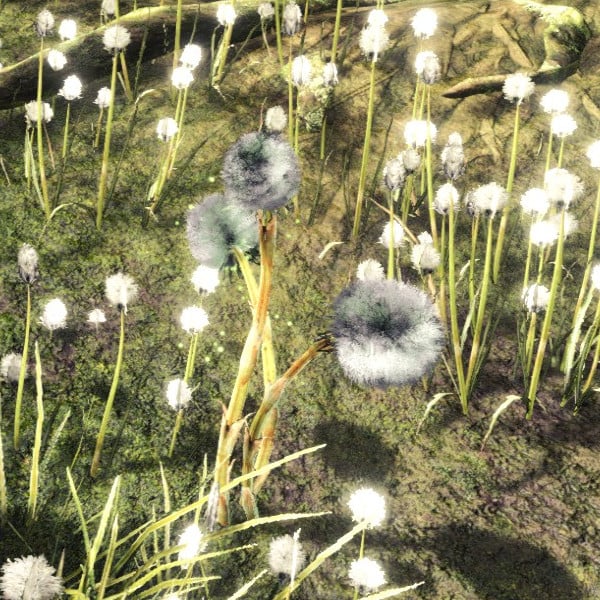
When struck, Sporepuffs release a cloud of spores that can be used to provide camoflague.
Sporepuffs can be recognized by their spherical fuzzy flowers. They can be used to hide similarly to tall grass and Smoke Bombs, and provide Health when used in conjunction with the Sporepuff Expert Skill. They can be triggered up close or at range with Weapons or Slinger Ammo.
Paratoads
When struck, Paratoads release a spray of gas strong enough to paralyze even large Monsters.
Paratoads can be recognized by their bright yellow coloring. They can be triggered up close or at range with Weapons or Slinger Ammo, allowing a Hunter to set up a powerful trap with good timing. The gas they release persists for five seconds.
Sleeptoads
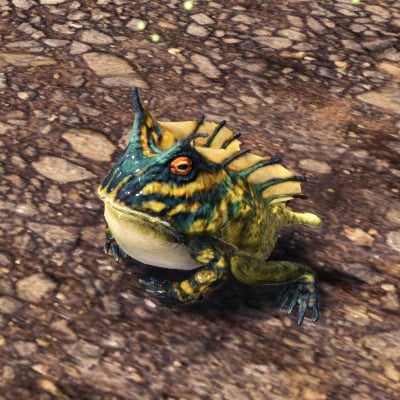
When struck, Sleeptoads release a spray of gas strong enough to put even large Monsters to sleep.
Sleeptoads can be recognized by their bright blue coloring. They can be triggered up close or at range with Weapons or Slinger Ammo, allowing a Hunter to set up a powerful trap with good timing. The gas they release persists for five seconds.
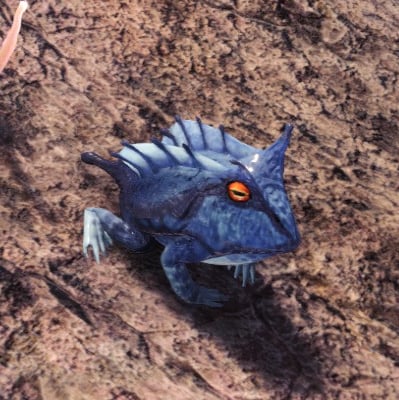
Nitrotoads
When struck, Nitrotoads release a spray of volatile liquid that explodes with enough power to stagger even large Monsters.
Nitrotoads can be recognized by their bright red coloring. They can be triggered up close or at range with Weapons or Slinger Ammo, allowing a Hunter to set up a powerful trap with good timing. The gas they release persists for five seconds.
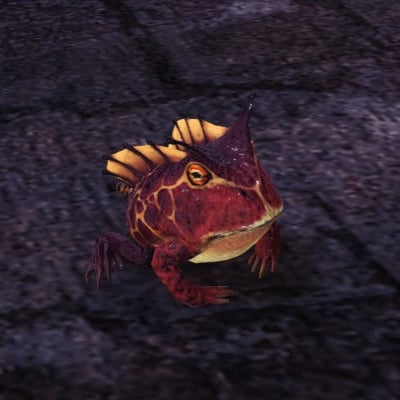
Wiggly Litchi
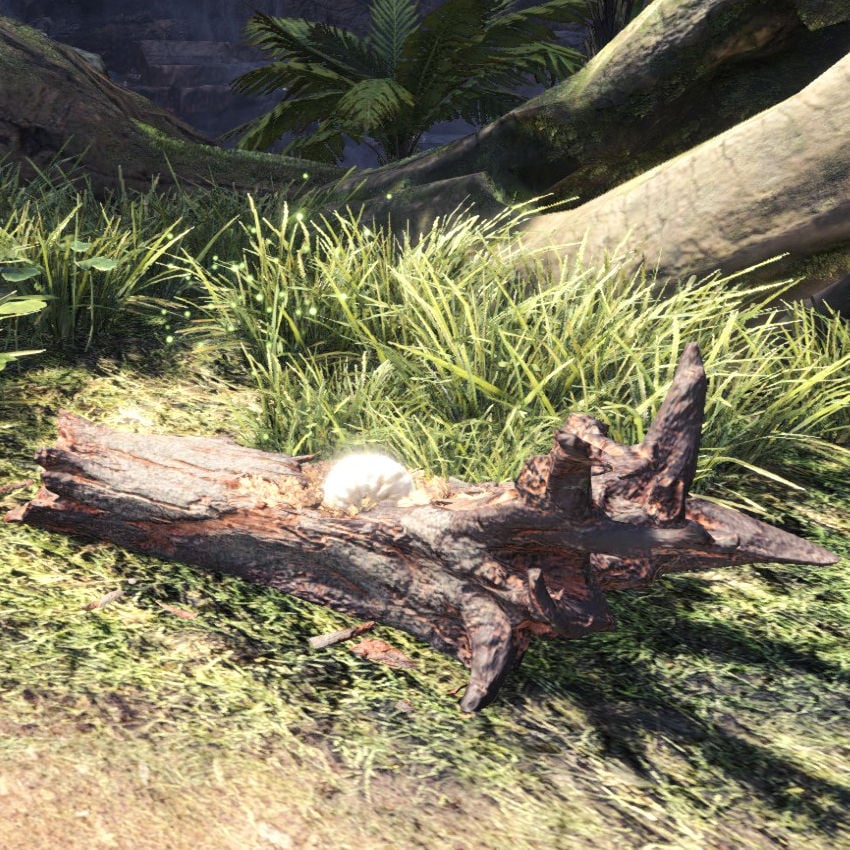
These nutrient-rich larvae can be consumed to halve Stamina depletion for a short time.
Wiggly Litchi appear as large white larvae living on rotting logs. Their buff is identical to that of Dash Juice, and is useful when wielding Weapons that require careful management of Stamina.
Vigorwasps & Giant Vigorwasps
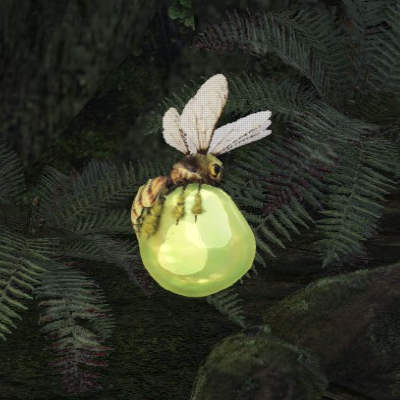
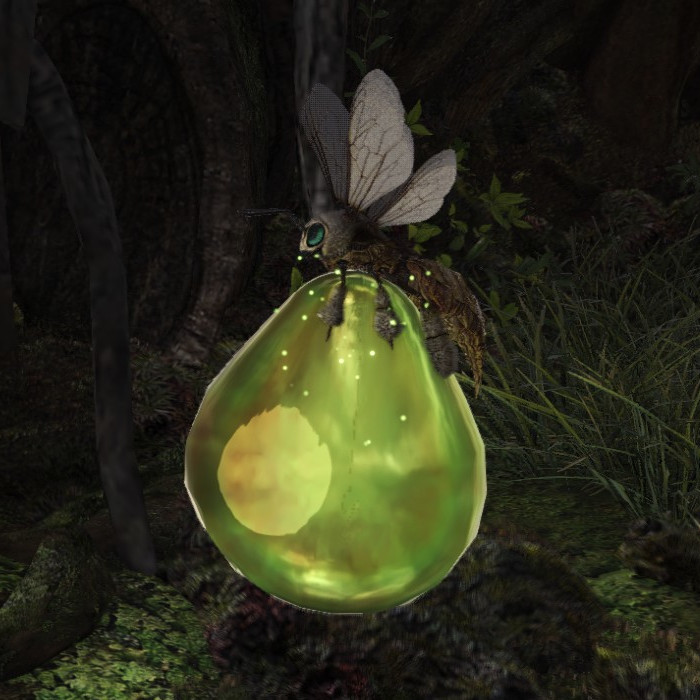
Vigorwasps collect Vitalily nectar to make their honey, and release it in a cloud when struck. this can serve as a useful method of healing when out in the field.
Vigorwasps can be recognized by their bright yellow coloring and by the large glob of bright green nectar that they carry. Their effect is identical to that of Vitalilies, and can be triggered up close or at range with Weapons or Slinger Ammo. There also exists a special Giant variation which recovers more Health.
Poisoncups and Poisonlanterns
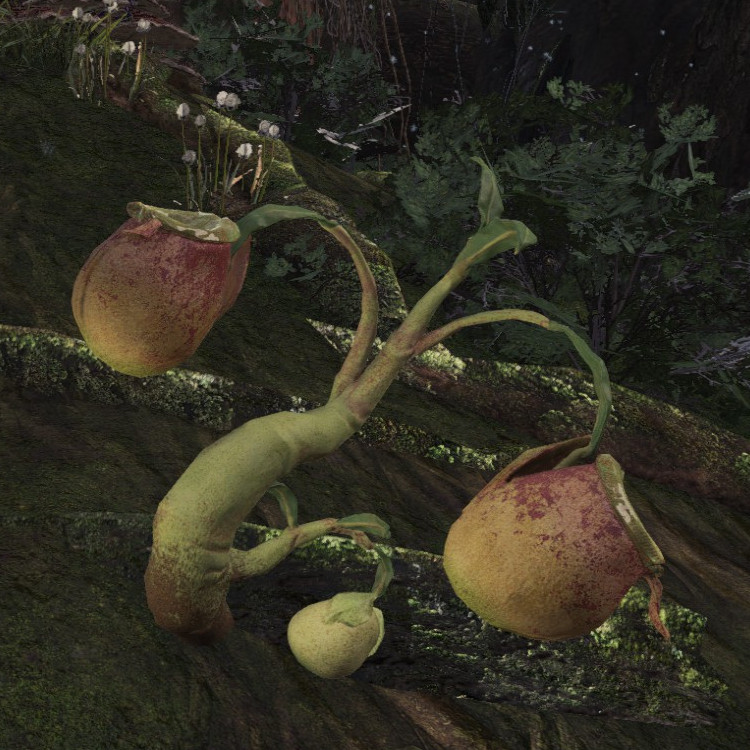
Poisoncups release a shower of poisonous fluid when struck. Watch your step, as the poison remains pooled on the ground for a short time.
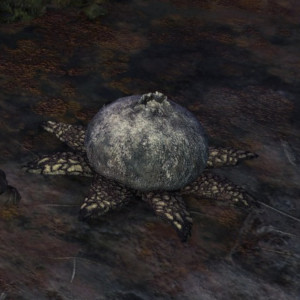
Poisoncup can be recognized by its large pitcher-shaped flower, while Poisonlanterns look like a large bulb close to the ground. They can be triggered up close or at range with Weapons or Slinger Ammo. The poison they leave persists for one minute, allowing for multiple successive Poison Ailments on the same Monster.
Wedge Beetles
Wedge Beetles can be found in many different places. Fix your aiming reticle on one and press
/
/
to hook onto it and swing across.
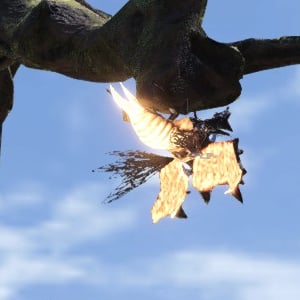
Wedge Beetles can be recognized by both their bright glowing abdomens and the distinctive chime they emit. They are usually found in high places and can be used for mobility and aerial attacks.
Thawpuffs
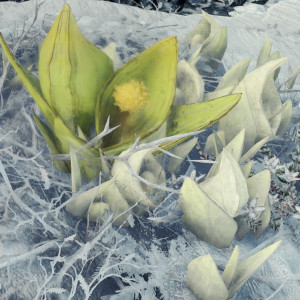
These plants will release a warm wind that increases Ice Resistance and negates Iceblight when struck.
Thawpuffs have large bright green leaves and emit visible heat waves. When triggered up close, they negate Iceblight and grant 50 Ice Resistance for 90 seconds.
Powercones
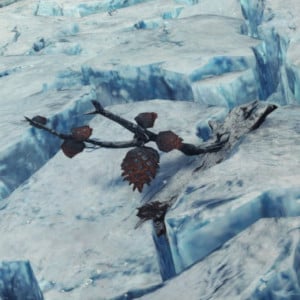
Has a stimulating effect, causing improved blood flow and increased strength when eaten.
Powercones are small red seed cones attached to a broken tree branch. They grant 5 points to Raw (Physical) Attack Power similarly to the Attack Boost Skill.
Passive Hazards
In addition to these interactive Components and Hazards, there are also passive ones. Passive Hazards include areas of deep water and deep snow found in the Wildspire Waste and Hoarfrost Reach, areas of acidic water and Effluvium found in the Rotten Vale, air currents found in the Coral Highlands and the Elder's Recess, and areas of Extreme Heat and Extreme Cold found in the Elder's Recess and Hoarfrost Reach.
Locations of Environmental Components and Hazards
All of the above mentioned Components and Hazards - along with other special Hazards such as dams and boulders - are listed here:
Ancient Forest
- Poison Cup (sector 6)
- Flashfly (sector 15)
- Sporepuff (sector 2, 6, 7, 14)
- Wiggly Litchi (sector 4, 5, 11, 12, 14)
- Vitalily (sector 1)
- Paratoad (sector 5, 9)
- Vine Floor (sector 13) - can make Hunters lose their footing if a Large Monster hits it
- Dam (sector 16) - can break under Large Monsters' attacks, unleashing a torrent that can sweep away Hunters and Monsters
- Suspended Boulders (sector 12)
- Vine Trap (sector 4, 8, 15)
Wildspire Waste
- Deep Water (sectors 9, 10) - slows down Hunter movement
- Quicksand Patch (sector 8) - if destroyed, leads to the underground section and stuns Monsters that fall through
- Poisoncup (sector 3)
- Sporepuff (sector 3)
- Vitalily (sector 2)
- Wiggly Litchi (sector 4, 6)
- Paratoad (sector 4)
- Flashfly (sector 13)
Rotten Vale
- Effluvium (sectors 6, 7, 8, 9) - covers large areas and slowly depletes Health
- Acid water (sectors 12, 14, 16) - quickly depletes Health while standing in it
- Poisoncup (sector 6)
- Vine Trap (sector 3)
- Sporepuff (sector 8)
- Wiggly Litchi (sector 10)
- Vitalily (sector 12)
- Paratoad (sector 10)
- Flashfly (sector 6)
Coral Highlands
- Air Pressure (sector 15) and Strong Wind (sector 12) - allows Hunters to travel or perform aerial attacks with the Glider Mantle
- Poisoncup (sector 13)
- Paratoad (sector 13)
- Flashfly (sector 10, 13)
- Sleeptoad (sector 5)
- Sporepuff (sector 8)
- Wiggly Litchi (sector 4)
Elders Recess
- Extreme Heat (sectors 7, 10, 11, 12, 13) - slowly depletes Health and leaves recoverable Damage
- Lava (sectors 7, 10, 11, 12, 13) - depletes Health while standing in it
- Lava Spout (sector 7) regularly throws lava in the air, heavily damaging anything above it
- Breakable Walls (sector 15) - usually destroyed by Nergigante during a fight in its nest
- Paratoad (sector 2)
- Nitrotoad (sector 2, 11)
- Flashfly (sector 15, behind south breakable wall)
- Air Pressure (sector 4) - allows Hunters to perform aerial attacks with the Glider Mantle
- Suspended Boulders (sector 8)
- Wiggly Litchi (sector 2)
- Lava Wall (sector 12) - only open during a Teostra or Lunastra Quest or Investigation. This leads to sector 13.
- Floor shards (Sector 15) - patches of crystal shards can be scattered by heavy attacks, such as a Greatsword's Charged Slash or a Gunlance's Overhead Smash
- Falling shards (sector 15) - shards of crystal/rock periodically fall from the formations overhead, dealing a small amount of damage, knocking back Hunters, and staggering Monsters
Hoarfrost Reach 
- Extreme Cold (all sectors) - causes maximum Stamina to drain much faster
- Geyser Rock (sector 13) - periodically spews hot water into the air, causing damage to Monsters
- Collapsed Snowfield (sector 4) - if this area is disturbed by Monster attacks or Barrel Bombs, it will collapse and form a tunnel to another sector
- Icicle Rock (sectors 9, 13) - can be knocked from the ceiling to damage and topple Monsters
- Floor shards (Sector 15) - patches of ice shards can be scattered by heavy attacks, such as a Greatsword's Charged Slash or a Gunlance's Overhead Smash
- Breakaway Ice (sectors 7, 15) - if the ice along the edges of these sectors is damages by Monster attacks, it can break away and force Monsters or Hunters down to the caves below
- Hot Spring (sectors 2, 6, 13) Standing in a Spring for a short time grants a Health recovery buff similar to one level of the Recovery Speed Skill
- Hot Spring Stone (sector 13) - this large chunk of mineral deposit can be picked up and carried. When dropped it will leave an area of effect that cures Iceblight, grants Health recovery like the Hot Spring itself, and persists for 90 seconds
- Grimalkyne Trap (sector 11)
- Vitalily (sectors 2, 6, 10)
- Poisonlantern (sector 8)
- Powercone (sector 15)
- Wiggly Litchi (sectors 6, 14)
- Paratoad (sector 8)
- Sleeptoad (sector 8)
- Flashfly (sector 9)
Preparing for the Environment and Hazards
Certain Skills, Items, and Specialized Tools protect players from the Environment and Hazards or allow them to be utilized. These are:
Skills
Items
- Cool Drink negates the effect of Extreme Heat
- Hot Drink negates the effect of Extreme Cold
- Nulberry negates many Blights and Status Effects upon consumption
Specialized Tools
- Glider Mantle
- Fireproof Mantle
- Thunderproof Mantle
- Waterproof Mantle
- Immunity Mantle
- Cleanser Booster
| Locations |
Ancient Forest ♦ Astera ♦ Canteen ♦ Castle Schrade ♦ Caverns of El Dorado ♦ Confluence of Fates ♦ Coral Highlands ♦ Elder's Recess ♦ Everstream ♦ Great Ravine ♦ Guiding Lands ♦ Hoarfrost Reach ♦ Origin Isle ♦ Research Base ♦ Rotten Vale ♦ Seliana Supply Cache ♦ Smithy ♦ Special Arena ♦ The Gathering Hub ♦ Wildspire Waste |
 Anonymous
 Anonymous
 Anonymous
 Anonymous

does the environmental damage negation work with fire put on the ground, like where lunastras blue puddles or fatalises fire on the ground does the hunting horn melody work on those too?
0
+10
-1