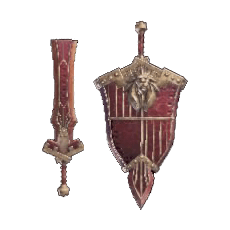
Teostra's Emblem is a Sword & Shield Weapon in Monster Hunter World (MHW). All weapons have unique properties relating to their Attack Power, Elemental Damage and various different looks. Please see Weapon Mechanics to fully understand the depth of your Hunter Arsenal.
Teostra's Emblem Information
- Weapon from the Teostra Monster
- Styled with the Teostra Alpha Armor Set and Teostra Beta Armor Set
- Upgraded from Teostra's Spada (previously from Blacksteel Sword II)
- This weapon has
 Blast damage
 - Notes and Tips go here
Teostra's Emblem Crafting and Upgrades
Teostra's Emblem has 2 different upgrade levels. It follows the bone path, detailed below.
| Rare | |||||||
| 7 | 252 |
|
0 | - | - | ||
| Craft with: Teostra Claw+ x2, Teostra Mane x2, Teostra Carapace x5, Teostra Powder x 4, 32000 x |
|||||||
| 8 | 266 |
|
0 | - | - | ||
| Craft with: Xeno'jiiva Soulscale x5, Teostra Horn+ x2, Teostra Claw+ x2, Teostra Gem x 1, 56000 x |
|||||||
Teostra's Spada Upgrade Tree
Teostra's Spada is part of an upgrade path for the Sword & Shield Weapon Tree. Below is an excerpt of the relevant independent tree.
Sword & Shield Independent Tree
 Dragonbone Sword I
 140
140  270
270
 Dragonbone Sword II
 154
154  330
330
 Dragonbone Sword III
 196
196  450
450 
 Dragonseal Aldsword I
 294
294  480
480 

 Dragonseal Aldsword II
 336
336  540
540 

 Manifested Lotus
 390
390  (450)
(450)  30
30 

 Fulminator
 154
154  270
270
 Thunderbolt Sword I
 210
210  300
300
 Thunderbolt Sword II
 224
224  360
360
 Ephemeral Fulminator
 336
336  510
510 Hydros Discus
 378
378  360
360  10%
10% 
 Blacksteel Sword I
 140
140  120
120
 Blacksteel Sword II
 154
154  150
150
 Teostra's Spada
 252
252  210
210
 Teostra's Emblem
 266
266  240
240
 Teostra's Medal
 364
364  270
270  15%
15%
 Xeno Mabura
 238
238  270
270  15%
15% 

 Xeno Mabura +
 392
392  330
330  15%
15% 

 Fatal Jho
 280
280  150
150  -20%
-20%
 Fatal Bite
 308
308  210
210  -20%
-20%
 Fate's Shear
 392
392  240
240  -20%
-20%
 Empress Edge
 266
266  120
120 
 Empress Edge "Blaze"
 266
266  150
150  20%
20% 

 Soulfire Barb "Blaze"
 350
350  180
180  20%
20% 


 Empress Edge "Ruin"
 280
280  120
120 

 Soulfire Barb "Ruin"
 378
378  150
150 

 Empress Edge "Styx"
 266
266  210
210  10%
10% 


 Soulfire Barb "Styx"
 350
350  240
240  10%
10% 

 Witcher's Silver Sword
 252
252  300
300 
 Witcher's Silver Sword +
 266
266  330
330 
 Witcher's Silver Sword ++
 364
364  480
480  High
High 

 Rajang Club
 406
406  60
60  -15%
-15% 
 Banned Rajang Club
 434
434  90
90  -15%
-15% 
 Brimstren Drakescale
 350
350  180
180  Avg
Avg 
 Stygian Luxuria
 378
378  240
240  Avg
Avg 
 Guild Palace Sword
 350
350  (330)
(330) 
 Royal Nova Sword
 378
378  (420)
(420) 
 Safi's Hellfang
 378
378  90
90  5%
5% 
 Safi's Aquafang
 378
378  90
90  5%
5% 
 Safi's Boltfang
 378
378  90
90  5%
5% 
 Safi's Frostfang
 378
378  90
90  5%
5% 
 Safi's Drakfang
 378
378  90
90  5%
5% 
 Safi's Bindfang
 378
378  180
180 

 Safi's Dreamfang
 378
378  90
90  5%
5% 
 Safi's Shatterfang
 378
378  180
180 

 Safi's Venomfang
 378
378  180
180 

 Lightbreak Sword
 420
420  180
180 

 Demonlord Mace
 406
406  300
300  15%
15%
 Alatreon Sword
 350
350  450
450  Low
Low 
 Alatreon Star
 392
392  570
570  Low
Low 

 Fatalis Sword
 434
434  60
60  High
High 

 True Fatalis Sword
 490
490  120
120  High
High 

 Anonymous
Page says It's from the bone tree which is incorrect, It's actually from the Sword and Shield Independent Tree under blacksteel sword I, here's a link:
https://monsterhunterworld.wiki.fextralife.com/Sword+and+Shield+Independent+Tree
 Anonymous
no,emblem requires 5 horns,its a ***** to make,hope its worth it :)

 Anonymous
This weapon sharpens faster than other SnS by one cycle. Speed Sharpening Lv 2 for this is the same as using Lv 3 with other weapons.

 Anonymous
So far, this is my favorite weapon in the game. With the speed and nobility of Sword and Shield, blast triggers frequently.
With the way blast works with buildup, the higher neutral damage with Blast Attack skill at 2-3, this is far superior to the Lumu SnS. Lumu has better buildup without Blast Attack, but without a 3 piece Zorah Armor set, you will miss out on a significant amount of damage from crit and other attack boosting stats.
With the high neutral damage, I use Maximum Might 3, Weakness Exploit 3 and Attack Boost 3/4 for some nice numbers that are followed up with frequent blasts with Blast Boost 3. Since critical and attack damage bonuses do not benefit the blasts, increasing the buildup (which isn’t high by default) makes a huge difference in maintaining DPS.
If you shield bash and use Slugger with this, monsters will get staggered from the blasts and knocked out with KO rather frequently.
My build is comprised of Nergigante beta head, body and legs, with Teostra alpha arms and waist. Attack Charm III is a nice compliment. One blast attack decoration is needed for blast 3.

Even the rarity 8 variant gets outclassed by the rarity 7 defender SnS in literally every single way. Couldn't they at least have given it some decoration slots like most other weapons do, so it has *something*? Having no decoration slots is the only downside of the defender weapons, and out of all other weapons, Teostra's didn't get any either.
0
+10
-1