Heavy Bowgun |
|
|---|---|
 |
|
|
|
| Weapon Type | Ranged |
| Damage Type | Shot (Ammo) Damage |
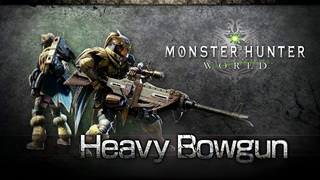
Heavy Bowgun (ヘビィボウガン hebi bougan, "heavy bowgun",重弩) is a weapon category in Monster Hunter World (MHW). Like all Weapons, it features a unique moveset and an upgrade path that branches out depending on the materials used. Please see Weapon Mechanics for details on the basics of your hunter tools.
The bowgun can be used to attack monsters from long range. There are two types of bowgun: the heavy bowgun, which can use powerful ammo, and the light bowgun, which allows for greater mobility and evasive capabilities, and faster shooting.
Heavy Bowgun Weapon Tree
For full details, including rank 9 and above weapons added with Iceborne please see Heavy Bowgun Weapon Tree
You can also see Master Rank Iceborne Heavy Bowguns.
Heavy Bowgun Traits & Abilities
- High damage
- Long Range
- Specializes in high damage, and explosive ammo
Heavy Bowgun Guide
The Heavy Bowgun is the artillery of ranged weapons. It specializes in high damage rounds at a range. While it does not have the same special effects of the Light Bowgun, the Heavy Bowgun dishes out damage more reliably, breaks parts faster, and staggers monsters more easily. Like the Light Bowgun, Heavy Bowguns have a modding system available, allowing hunters to customize their weapon slightly, for example by reducing reload times, or providing a limited capacity to guard. Lastly, the Heavy Bowgun has an optimal range for firing. Being too far away from the target will cause shots to do less damage. The optimal range will vary based on ammo, and the crosshairs will glow orange when the monster is in the optimal range.
Using a variety of specialised ammo, the Heavy Bowgun user is also able to act as a proficient support character. Recover, Armor, and Demon rounds can heal and buff allies quickly and at a distance, while status inflicting rounds (especially Sleep and Paralysis rounds) can set a hunting party up for devastating co-ordinated attacks. Because being a dedicated Heavy Bowgun user requires a mastery of inventory management and the crafting system, these hunters are often the ones who bring full arsenals to tough hunts, including barrel bombs and traps.
Movement with the Heavy Bowgun drawn is extremely slow, and the roll, while covering a significant distance, is very unwieldy. This, combined with the frequent need to leave oneself completely vulnerable while reloading, means adept Heavy Bowgun users will need to know when to pick their range as well as their timing, as dodging, countering, and guarding are not nearly as effective as with other weapon classes.
Though primarily a ranged weapon, the Heavy Bowgun's melee attack, while extremely unwieldy, does do reasonable damage and applies stun damage when hitting the monster's head. This will also be used as a mounting attack when used while leaping.
Heavy Bowgun Advantages
- Typically higher ammo capacity and lower recoil compared with Light Bowgun
- Veritable artillery with high damage potential
- Can block if equipped with a shield
- Access to unique, high-damage ammunition types (Wyvern Ammo and Cluster Bomb)
- Highest damage in the game with Spread Lv3
- Unique dodge that covers a lot of distance
Heavy Bowgun Disadvantages
- Slow movement
- Very slow dodge
- Must supply own ammo
- Slow sheathing speed
- Guarding ability is mediocre without multiple shield mods and/or the Guard skill
Attachments
Attachments are various mods that can be put onto a bowgun to alter its stats. Attachments are free, can be swapped out at any time at the smithy, and can stack. The number of mods that can be put onto a bowgun depends on its rarity rank: Ranks 1 and 2 have one mod slot; Ranks 3 and 4 have two; Ranks 5 to 8 have three; Rank 9 has four; Ranks 10 to 12 have five.
Available mod types:
- Recoil Suppressor: Lowers the recoil when firing. Note that lower recoil also means higher rate of fire, essentially improving damage output. Effectiveness varies with what ammo type is being used.
- Reload Assist: Speeds up reload times. Effectiveness varies with what ammo type is being used.
- Deviation Suppressor: Lowers deviation. Can only be used if the bowgun has deviation.
- Close Range Up: Increases damage at close range.
- Long Range Up: Increases damage at long range.
- Shield: Allows the user to guard incoming attacks.
- Long Barrel: Increases critical range and projectile speed.
- Power Barrel: Increases tick rate for piercing ammo types and stun/exhaust build-up for Sticky/Exhaust ammo.
- Wyvernheart Mod: Replaces Wyvernheart with Wyvernheart Type 2.
- Wyvernsnipe Mod: Replaces Wyvernsnipe with Wyvernsnipe Type 2.
- Special Scope: Allows to equip the Special Scope, which increases damage by 30% when hitting a target at supercritical range.
Ammo Types
The Ammo a hunter can use varies with the Bowgun they have equipped. It is also important to note that ammo performance for one model of Bowgun (in terms of shots per magazine, recoil, rate of fire, and reload speed) may perform radically differently on another model of Bowgun. Always check the detailed description of a Bowgun model before investing resources into crafting it!
Each damaging Ammo type has its own Motion Value (MV), which is used when calculating damage. Elemental attacks from Bowguns are subjected to both this and the Weapon type multiplier, and use the Raw Attack value as the starting Elemental value. See Damage Types for more information.
See Bowgun Ammo for a quick list of Ammo Types.
- Normal: Normal Ammo (fires a standard single shot). MVs:
- Lv1: 10
- Lv2: 20
- Lv3: 34
- Pierce: Pierce Ammo (fires a straight shot that pierces through monsters to hit them multiple times. Number of hits is dependent on the ammo strength and the frame rate. Damage is reduced after the 9th hit). MVs:
- Lv1: 7 * number of hits
- Lv2: 7 * number of hits
- Lv3: 9 * number of hits
- Spread: Spread Ammo (fires a short-ranged shotgun blast). MVs:
- Lv1: 6 * 3
- Lv2: 7 * 5
- Lv3: 8 * 7
- Sticky: Sticky Ammo (attaches a charge to the target that explodes after 5 seconds. Fixed damage, ignores hitzone values and cannot crit. Deals a small amount of Fire damage. Applies Stun if explosion hits the monster's head). MVs:
- Lv1: 12
- Lv2: 17
- Lv3: 24
- Cluster: Cluster Bomb (lobs bombs that fragments into multiple explosive shells on impact. Fixed damage, ignores hitzone values and cannot crit. Deals a small amount of Fire damage). MVs:
- Lv1: 17 * 3
- Lv2: 20 * 4
- Lv3: 26 * 5
- Wyvern: Wyvern Ammo (charges a big explosive shot that knocks the hunter back and deals massive damage to the monster. Fixed damage, ignores hitzone values and cannot crit. Deals a small amount of Fire damage). MV: 70 + 19
- Recover: Recover Ammo (heals teammates and palicos)
- Lv1: restores 30 HP
- Lv2: restores 50 HP
- Poison: Poison Ammo (inflicts Poison on the target)
- Lv1: 40 Poison build-up
- Lv2: 80 Poison build-up
- Paralysis: Paralysis Ammo (inflicts Paralysis on the target)
- Lv1: 40 Paralysis build-up
- Lv2: 80 Paralysis build-up
- Sleep: Sleep Ammo (inflicts Sleep on the target)
- Lv1: 40 Sleep build-up
- Lv2: 80 Sleep build-up
- Exhaust: Exhaust Ammo (inflicts Exhaust on the target, or Stun if it hits the head)
- Lv1: 50 Exhaust or 20 Stun
- Lv2: 100 Exhaust or 40 Stun
- Flaming/Freeze/Thunder/Water: Elemental Ammo (deals elemental damage, scaling off the weapon's raw Attack. Pierces through the monster in a straight line, but can only hit the same part once). MV: [8 (shot) + 22 (element)] * number of hits
- Dragon: Elemental Ammo (deals elemental damage, scaling off the weapon's raw Attack. Fires a slow, short-range arcing projectile that ticks multiple times). MV: [2 (shot) + 18 (dragon)] * number of hits
- Slicing: Slicing Ammo (attaches a charge to the target that explodes after 5 seconds. Deals sever damage). MV: 6 * 5
- Demon: Demon Ammo (increases the Attack of a teammate or palico by 10 for 120 seconds).
- Armor: Armor Ammo (increases the Defense of a teammate or palico by 30 for 120 seconds).
- Tranq: Tranq Ammo (used to capture monsters. Works just like Tranq bombs)
Special Ammo
Special Ammo recharges over time. Some can be used before they are fully recharged but to reduced effect. The special ammo a hunter has available is determined by the Bowgun they have equipped. Every Bowgun has only one special ammo.
- Wyvernsnipe: Has one charge, takes 80 seconds to recharge. The hunter lays on the ground and fires of a powerful shot at will. This shot pierces the target, hitting it up to 7 times and then exploding for massive damage. Explosions deal increased damage for further ticks with the following structure: S>S>M>M>L>L>L. They also deal a small amount of Fire damage. MVs:
- Tick: 20
- Small explosion: 38 (blunt damage, cannot crit)
- Medium explosion: 49 (blunt damage, cannot crit)
- Large explosion: 81 (blunt damage, cannot crit)
- Wyvernsnipe Type 2: Has one charge, takes 80 seconds to recharge. Replaces the piercing effect and the explosions with a strong single explosion that triggers after a short time. The damage varies depending on the distance and the hitzone value of the part you're targeting. Cannot crit. MVs:
- Incorrect distance, HZV <30: 81
- Correct distance, HZV >=30: 98
- Incorrect distance, HZV <30: 147
- Correct distance, HZV >=30: 243
- Wyvernheart: Has a charge meter, can be used even if the meter isn't full. Fires bullets continuously until the meter is empty, up to a total of 50 bullets for a full meter. The bullet damage increases the more you hit a target continuously and decreases if you miss the target. MVs:
- Initial: 9
- After 3 hits: 11
- After 5 hits: 12
- After 8 hits: 14
- After 10 hits: 16
- After 12 hits: 19
- Wyvernheart Type 2: Has a charge meter, can be used even if the meter isn't full. Works the same as normal Wyvernheart, except the damage cap is higher, the bullet count increases twice as fast and you get twice the penalty for missing a target. MVs:
- Initial: 9
- After 3 hits: 11
- After 5 hits: 12
- After 8 hits: 14
- After 10 hits: 16
- After 12 hits: 19
- After 15 hits: 21
- After 18 hits: 23
Heavy Bowgun Controls
 (Hold): Aim
 : Fire (also reloads if magazine is empty)
 : Load/Unload Special Ammo
 : Reload
- D-pad up/down or
 +
+  /
/  : Select Ammo
  +
+  : Melee Attack. MV: 30
- Midair
 : Jumping Reload (performs a Melee Attack and reloads at the same time)
  +
+  : switch between Aim and Slinger
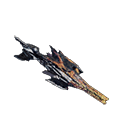
Heavy Bowguns are a type of Weapon in Monster Hunter World (MHW). This page shows a visual gallery of all different styles for Heavy Bowguns. Weapons are often upgraded based on previous decisions, with different paths leading to different looks and necessitating different materials. You can find detailed upgrade path information in the Heavy Bowgun Weapon Tree or by clicking each individual weapon below.
Iceborne Heavy Bowguns are Master Rank Heavy Bowguns in Monster Hunter World Iceborne (MHW). These rare 9 and above weapons were added with the Iceborne Expansion and can only be obtained by players who own the expansion. The weapons use Master Rank Materials that can be obtained by completing quests and doing endgame content.
Iceborne Heavy Bowguns
You can search by Name, Rarity, Affinity, or Element. Just type into the search box what you are looking for.
Quick Search of All Heavy Bowguns
Ammo Types
The following is a list of all Bowgun Ammo types.
Icon |
Name |
Notes |
|---|---|---|
| Normal Ammo | Basic ammunition. Comes in three levels of increasing damage. Deals Ammo Damage. | |
| Pierce Ammo | Ammo which penetrates in a line, causing more damage the further it travels through the target. Deals Ammo Damage. | |
| Spread Ammo | Shotgun-like ammo that fires multiple pellets with short range. Deals Ammo Damage. | |
| Sticky Ammo | Attaches a small explosive charge which explodes after a delay. Can cause Stun buildup. | |
| Cluster Bomb | An arcing shot which splits into multiple explosives. Causes heavy knockback to Allies. | |
| Recover Ammo | Restores Health to Allies. Effectiveness increases with level. | |
| Poison Ammo | Causes Poison status buildup. Effectiveness increases with level. Success is indicated by purple saliva from a Monster's mouth. | |
| Paralysis Ammo | Causes Paralysis status buildup. Effectiveness increases with level. | |
| Sleep Ammo | Causes Sleep status buildup. Effectiveness increases with level. | |
| Exhaust Ammo | Reduces a Monster's Stamina. Effectiveness increases with level. | |
| Flaming Ammo | Causes |
|
| Water Ammo | Causes |
|
| Freeze Ammo | Causes |
|
| Thunder Ammo | Causes |
|
| Dragon Ammo | Causes |
|
| Slicing Ammo | Attaches a charge that explodes and causes Cut Damage. | |
| Wyvern Ammo | Short range, slow, yet highly damaging ammo. Requires a short chargeup to fire. | |
| Demon Ammo | Boosts Attack Power of Allies for a short time. | |
| Armor Ammo | Boosts Defense of Allies for a short time. | |
| Tranq Ammo | Functions identically to Tranq Bomb. |
Heavy Bowguns Gallery MHW
Heavy Bowgun Ore Weapons
Heavy Bowgun Bone Weapons
Kulve Taroth Heavy Bowguns
Safi'jiiva Weapons
| Weapons |
Bow ♦ Charge Blade ♦ Dual Blades ♦ Great Sword ♦ Gunlance ♦ Hammer ♦ Hunting Horn ♦ Insect Glaive ♦ Lance ♦ Light Bowgun ♦ Long Sword ♦ Switch Axe ♦ Sword & Shield |
 Anonymous
Heavy Bowgun and Guard/Shield blocking mechanics.
Guard Requirements.
Heavy Bowgun has at least 1 shield mod is equiped. (Sword & Shield, Great Sword, Charge Blade, Lance and Gunlance also have block mechanics).
Source of damage is in front arc.
Character is NOT perorming reloading animation, firing animation, stunned animation etc.
Knockback_Threshold level
Shield mod Guard_angle Light KB Medium KB Heavy KB
1 120 14 20 21+
2 120 14 39 40+
3 120 39 49 50+
4* 120 39 49 50+
*4th shield halves the chip damage.
Other weapons
Knockback_Threshold level
Guard_angle Light KB Medium KB Heavy KB
Sword & Shield 120 14 20 21+
Great Sword 140 14 39 40+
Charge Blade 140 14 39 40+
Lance 220 39 49 50+
Gunlance 220 39 49 50+
Each attack has different Knockback_Value.
Full move list can be found in the link.
https://mhworld.kiranico.com/monsters
After blocking the attack:
Knockback_Value is compared to current weapon's Knockback_Threshold, resulting in Light/Medium/Heavy hit.
Character then loses 10/25/40 stamina multiplied by Stamina_Depletion_Modifier.
Not enough stamina - no block, full hit, 100% damage. Otherwise there will be only 0%/10%/20% chip damage, affected by defense.
[Guard Up] allows blocking SOME of otherwise unblockable attacks.
[Guard] skill modifies knockback level and stamina damage.
Guard level Knockback_Threshold bonus Stamina_Depletion_Modifier
1 10 1.00
2 10 0.85
3 20 0.85
4 20 0.70
5 30 0.50
 Anonymous
how much damage do you get from close range mod, and does it get less effective the more you use it? (eg: 5 close range mods equipped)

 Anonymous
 Anonymous
 Anonymous
I like how hbg speedruns are either constant stun locking or some sort of cheese strats all hail end game glass canon meta.

 Anonymous
 Anonymous
Why does this page say "highest damage in the game with spread 3" when heavy bowguns can't fire spread ammo?

 Anonymous
I have the heavy bowgun equipped and cluster bomb ammo has an X over it. Why is it disabled?

 Anonymous
Does anyone know what gives my hbg a scope (not the laser pointer)? Saw it in a couple of vids but I can't make it appear on my gun. Tried everything out, nothing happened. Only the shield modification becomes visible. Where's the visible scope on my hbg?

 Anonymous
HBG auto-reloading after knock-downs or weapon drawing, is utter cancer concocted from Crapcom's casual caramel cavern of carnal concupiscence. Some 90% of my OHKO's come from this idiotic, control-circumventing mechanic for morons... Which the Crapclowns 'forget' to fix or given and option for with the Iceborne update. Disgusting.

 Anonymous
 Anonymous
does having 2 or 3 shield mods make a difference in blocking damage?

 Anonymous
 Anonymous
For who are interested in piercing ammo damage, I've a posted on reddit an analysis of the damage dealt on various builds.
https://www.reddit.com/r/MonsterHunter/comments/8m57x4/hbg_piercing_ammo_damage_analysis/
 Anonymous
I need help knowing which Heavy Bowgun can fire the most types of ammo that gives buffs and heals (Recovery, Armor, Demon, etc.). I play as a support for friends.

 Anonymous
Okay so looking through the upgrade trees for both heavy and light i cant see any real reason for upgrades other than damage and extra mods? Am i missing something coz it appears that the upgrades don't give any element boosts or any specific upgrades?

 Anonymous
The Wyvernheart bullet damage appears to ramp up as you keep firing, up to double the starting damage. So it's most effective if you can unload the entire bar in one continuous volley.

 Anonymous
It takes Wyrmheart HBG 250 seconds to recharge fully (4m 10s). Using lvl 1 focus, which is 5% cdr, it should in theory reduce wymheart recharge by 12.5 seconds making it 237.5 recharge or 3m 57.5 sconds. ~ After test I have concluded that Focus does indeed work with HBG Wyrmheart. I have consistently landed on 3 mins 57 seconds recharge with lvl 1 Focus.

 Anonymous
I love what they added for the HBG. Its just so damn badass now. Its everything I've always wanted back when I played the Wii U MH. I love this game!

 Anonymous
I see special ammo will regenerate but do you have to pay for most ammo? Is their a similar money/time sink associated with melee weapons?




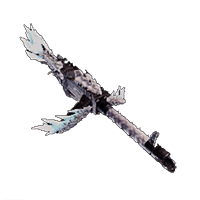
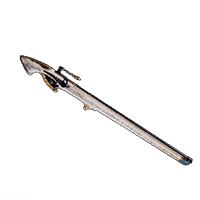
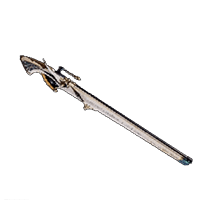
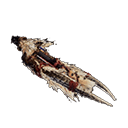
god tier weapon, if you died using this weapon that mean u r using it wrong. 100% better than Long sword.
2
+10
-1