Hammer |
|
|---|---|
 |
|
|
|
| Weapon Type | Melee |
| Damage Type | Blunt Damage |
| Upgrades | ?? |
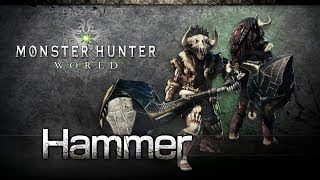
Hammer (ハンマー hanmaa, "hammer") is a weapon category in Monster Hunter World (MHW). Like all Weapons, it features a unique moveset and an upgrade path that branches out depending on the materials used. Please see Weapon Mechanics for details on the basics of your hunter tools.
The hammer is a powerful blunt weapon with a surprising
amount of mobility. It's also possible to stun monsters by
delivering a hammer attack to the head.
Hammer Weapon Tree
For full details, including Iceborne Expansion Weapon Tree please see Hammer Weapon Tree
See Iceborne Hammers for a list of the expansion weapons.
Hammer Traits & Abilities
- Hard hitting moveset complemented by powerful charge attacks
- Doesn't hamper mobility despite its weight
- Deals only blunt damage, which stuns (KO) monsters
Hammer Guide
The ultimate evolution of sticks with a rock on the end, the Hammer is a fast, hard hitting weapon. As expected, the Hammer deals only blunt damage which makes it perfect for dealing stun damage and knocking out the monster. The Hammer's basic attacks are surprisingly fast for such a heavy weapon, and deal quite a bit of damage. They also have high chaining potential, and are very good at hitting the same spot over and over again, like the monster's head to rack up stun damage. Hammers can also do charge attacks. They have three charge levels, just like the Greatsword, but the Hammer allows hunters to run around while charging up their attack. The type of charge attack also changes base on if the hunter is standing still or moving when the attack goes off. The moving charge attack can also be chained into follow up attacks. Lastly, Hammers can do a self buff while charging. This buff increases attack damage and stun damage, and gives minor hyper armor during charge attacks. The Hammer was built to cave in monster skulls with brutal efficiency, and it is very good at its job.
Power Charge
You can perform a Power Charge to boost your attack power, stun power and flinch resistance while attacking, as well as to get access to more powerful versions of your attacks. The effect persists until you sheathe the weapon or get flinched (including roars)/tripped/knocked down.
Stunning Monsters
Stuns can be achieved more easily by hitting monsters' heads with Upswings or Brutal Upswings.
Charged Slide
Release R2 during a slide to perform an aerial spinning attack, or chain the Charged Slide into a Jumping Attack by pressing ![]() .
.
Hammer Advantages
- Very High Raw Attack Power
- Good movement speed with weapon drawn
- Charged attacks are extremely powerful
- Can KO monsters and apply exhaust
- The best sliding attack in the game
- The ability to grapple onto monsters after a lv2 or 3 charge attack as well as quick clutch claw attack makes it very good at creating weak spots
Hammer Disadvantages
- No guarding or evasive moves
- Heavy and slow attacks requiring practice to get them right
- Not favoured for Elemental Damage
- Relatively short reach
- Charging consumes stamina
Hammer Controls
Each move has its own Motion Value (MV), which is used when calculating Raw (physical) Damage. See the article on Attack Power for more information.
 : Overhead Smash (Can be chained up to 3 times). MVs:
- Overhead Smash I: 37
- Overhead Smash II: 23
- Upswing: 86
 +
+  with weapon sheathed: Swing. MV: 20
 after Swing: Backswing. MV: 16
 : Big Bang (Can be chained up to 5 times, but the chain stops if an attack misses). MVs:
- I: 28
- II: 32
- III: 45
- IV: 65
- Finisher: 28 + 28 + 100
 (Hold): Charge (drains stamina).
 (Release) while standing still (Lv1/Lv2 can chain into Overhead Smash or Big Bang):
- Charged Side Blow (Lv1): 18
- Charged Follow-up (
 after Charged Side Blow): 25
 - Side Smash (
 after Charged Side Blow /
  after Charged Upswing): 15
 - Charged Upswing (Lv2): 38
- Charged Brutal Upswing (Lv2, Power Charged): 45
- Charged Big Bang (Lv3): 15 + 76
- Charged Brutal Big Bang (Lv3, Power Charged): 15 + 15 + 85
 (Release) while jumping/
 while charge sliding: Jumping Charged Attack. MVs:
- Lv1: 65
- Lv2: 70
- Lv3: 80
 (Release) while sliding/wallriding: Midair Spinning Bludgeon. MVs: 25 * number of hits + 100
 (Release) while moving: Spinning Bludgeon. MVs: 26 + 18 * number of hits (up to 4)
- After 1st spin of Spinning Bludgeon,
 : Spinning Side Smash. MV: 19
 - After 2nd or 3rd spin of Spinning Bludgeon,
 : Spinning Follow-up. MV: 56
 - After 4th or 5th spin of Spinning Bludgeon,
 : Spinning Strong Upswing. MV: 86
 - While holding
 ,
,  : Power Charge (Self buff, gives slight increase to damage/stun power and a Flinch Free effect while attacking. Lasts until weapon sheathed or hunter is staggered.)
 - Hold
 up to Charge Lv2 or 3, then
  : Slinger Burst (a powerful slinger shot that has high chances of flinching the monster).
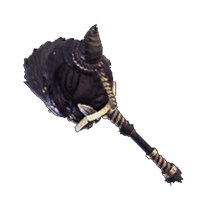
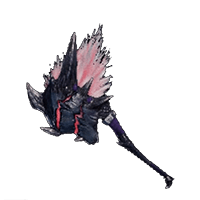
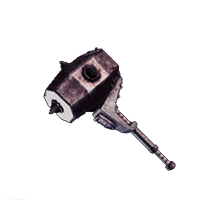
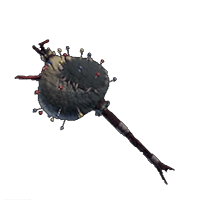
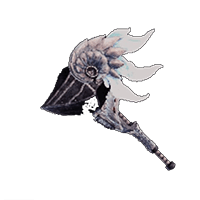
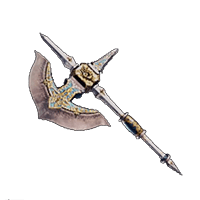
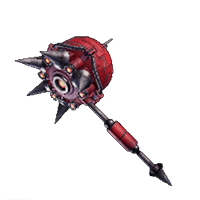
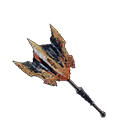
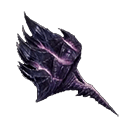
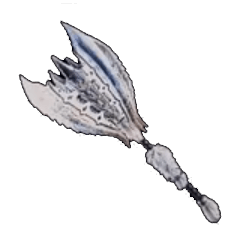
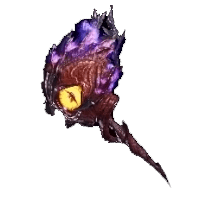
Hammers are a type of Weapon in Monster Hunter World (MHW). This page shows a visual gallery of all different styles for Hammers. Weapons are often upgraded based on previous decisions, with different paths leading to different looks and necessitating different materials. You can find detailed upgrade path information in the Hammer Weapon Tree or by clicking each individual weapon below.
Iceborne Hammers are Master Rank Hammers in Monster Hunter World Iceborne (MHW). These rare 9 and above weapons were added with the Iceborne Expansion and can only be obtained by players who own the expansion. The weapons use Master Rank Materials that can be obtained by completing quests and doing endgame content.
Iceborne Hammers
You can search by Name, Rarity, Affinity, or Element. Just type into the search box what you are looking for.
Quick Search of All Hammers
| Name | Attack | Affinity | Element | Rare |
| Kurogane I |
1144 | 0% | 9 | |
| Kurogane II |
1248 | 0% | 10 | |
| Kurogane III |
1352 | 0% | 11 | |
| Red Bludgeon |
1144 | 15% | 10 | |
| Huracan Hammer |
1248 | 20% | 10 | |
| Cocytus + |
1196 | 0% | 10 | |
| Pykrete Punisher |
1300 | 0% | 11 | |
| Water Basher IV |
1092 | 0% | 9 | |
| Aqua Flora |
1144 | 0% | 9 | |
| Aqua Flora + |
1248 | 0% | 10 | |
| Aqua Florescence |
1300 | 0% | 11 | |
| Glacial Bash I -
|
1144 | 20% | 10 | |
| Glacial Bash II |
1248 | 25% | 10 | |
| Naaga Matraca I -
|
1040 | 20% | 9 | |
| Naaga Matraca II -
|
1248 | 20% | 10 | |
| Nyx Hammer I |
1144 | 0% | 9 | |
| Nyx Hammer II |
1248 | 0% | 10 | |
| Buona Flora + |
1092 | 0% | 9 | |
| Buona Florescenza |
1300 | 0% | 10 | |
| Hidden Breaker -
|
1092 | 10% | 10 | |
| Hidden Breaker + -
|
1144 | 15% | 10 | |
| Night Eternal -
|
1248 | 20% | 11 | |
| Lightning Bash IV |
1144 | 0% | 9 | |
| Usurper's Thunder |
1248 | 0% | 10 | |
| Usurper's Thunder + |
1300 | 0% | 11 | |
| Earth Ender I |
1196 | 0% | 9 | |
| Earth Ender II |
1300 | 0% | 10 | |
| Earth Ender III |
1456 | 0% | 11 | |
| Iceshaker |
1352 | 0% | 11 | |
| Victorious Northlein |
1404 | 0% | 12 | |
| Pandemonium's Wrath |
1248 | 0% | 11 | |
| Pandemonium Unleashed |
1352 | 0% | 12 | |
| Baan Gavel I -
|
1196 | 0% | 9 | |
| Baan Gavel II -
|
1300 | 0% | 10 | |
| Striped Striker -
|
1300 | -20% | 10 | |
| Striped Striker + -
|
1404 | -20% | 10 | |
| Tigrex Hammer -
|
1456 | -20% | 11 | |
| Uragaan Hammer I |
1300 | 0% | 10 | |
| Uragaan Hammer II |
1508 | 0% | 10 | |
| Scorching Isshata |
1144 | 0% | 10 | |
| Scorching Isshata + |
1248 | 0% | 10 | |
| Glavenus's Uruga |
1352 | 0% | 11 | |
| Makhlab al-Nasr I -
|
1092 | 25% | 9 | |
| Makhlab al-Nasr II -
|
1352 | 25% | 10 | |
| Mammoth Hoof I |
1248 | 0% | 9 | |
| Mammoth Hoof II |
1456 | 0% | 10 | |
| Blackwing Deathblow I |
1352 | 20% | 10 | |
| Blackwing Deathblow II |
1404 | 25% | 11 | |
| Diablos Shatterer III |
1352 | -25% | 10 | |
| Chaos Shatterer |
1508 | -25% | 10 | |
| Sulfurteinn Alcan |
1404 | 0% | 10 | |
| The Grinding Mallet |
1508 | 0% | 11 | |
| Barroth Crusher I |
1248 | -10% | 9 | |
| Barroth Crusher II |
1404 | -10% | 10 | |
| Dios Tailhammer -
|
1248 | 0% | 10 | |
| Brachy Tailhammer |
1352 | 0% | 11 | |
| Anja Fiercemaul I -
|
1196 | -20% | 9 | |
| Anja Fiercemaul II -
|
1404 | -20% | 10 | |
| Grinding Fulgur I -
|
1248 | 10% | 10 | |
| Grinding Fulgur II |
1300 | 20% | 10 | |
| Dragonseal Basher I |
1092 | 0% | 10 | |
| Dragonseal Hammer II |
1248 | 0% | 11 | |
| Dawning Tranquility |
1456 | 0% | 12 | |
| Daora's Hyperborea |
1352 | 15% | 11 | |
| Consummate Hammer -
|
1456 | -30% | 12 | |
Leonid Starcrusher
|
1404 | 20% | 12 | |
Ruinous Obliteration
|
1508 | 0% | 12 | |
| Despot's Crackle |
1352 | 0% | 12 | |
| Magda Floga Reforged |
1456 | -20% | 11 | |
Soulfire Heel "Blaze"
|
1300 | 20% | 12 | |
| Soulfire Heel "Ruin" |
1404 | 0% | |
12 |
Soulfire Heel "Styx" 
|
1300 | 10% | 12 | |
Mane Malice 
|
1508 | -15% | 11 | |
Mane Malice Rajang 
|
1612 | -15% | 12 | |
Brimstren Drakemaw 
|
1300 | 0% |  Dragon 240 Dragon 240 |
11 |
Stygian Industria 
|
1404 | 0% |  Dragon 270 Dragon 270 |
12 |
| Bristly Inferno
|
1352 | 0% | 11 | |
Xeno Maph'agarna +  
|
1456 | 15% |  Dragon 270 Dragon 270 |
12 |
Safi's Hellcrusher 
|
1612 | 5% | 12 | |
Safi's Aquacrusher 
|
1612 | 5% | 12 | |
Safi's Boltcrusher 
|
1612 | 5% | 12 | |
Safi's Frostcrusher 
|
1612 | 5% |  Ice 210 Ice 210 |
12 |
Safi's Drakcrusher 
|
1612 | 5% |  Dragon 210 Dragon 210 |
12 |
Safi's Bindcrusher 
|
1612 | 5% | 12 | |
Safi's Dreamcrusher 
|
1612 | 5% | 12 | |
Safi's Shattercrusher 
|
1612 | 5% | 12 | |
Safi's Venomcrusher 
|
1612 | 5% | 12 | |
| Space Lord! Super-8
|
1248 | 0% | |
12 |
| Well-done Hammer
|
1404 | 0% | 10 | |
| Juicy Well-done Hammer
|
1612 | 0% | 11 | |
Guild Palace Mace 
|
1300 | 10% | 10 | |
Royal Cross Mace 
|
1404 | 15% | |
12 |
| Demonlord Sledge
|
1508 | 15% | 12 | |
Lightbreak Hammer  
|
1560 | 0% | 12 | |
Alatreon Hammer 
|
1300 | 0% |  Dragon 630 Dragon 630 |
11 |
Alatreon Metamorph  
|
1456 | 0% |  Dragon 720 Dragon 720 |
12 |
| Polaris Bash
|
1404 | 15% |  Ice 660 Ice 660 |
11 |
Hammers Gallery MHW
Hammer Ore Weapons
Hammer Bone Weapons
Kulve Taroth Hammers
Safi'jiiva Weapons
 Anonymous
The controls are wrong for Spinning Bludgeon. When I do it, it hits 7 times, not 5. The first hit does more dmg, the 5 middle hits do the same amount, and the last hit does the most dmg. The follow-up swings (if you hit triangle) are also at different swings than indicated.

 Anonymous
I love how this weapon has 3, COUNT THEM, 3 WAKEUPS to choose from without making any of them inferior to one another. I'm talking about the Charged Brutal Big Bang, which doesn't require any special conditions while allowing for a Spinning Clutch follow-up, the Jumping Charged Attack III, which requires a slope/Velkhana ice/ledge to pull of while dealing more damage than most with Airborne equipped AND while dealing mounting damage WITHOUT taking away the opportunity to go into a Spinning Clutch, and the plain ol' Upswing, which deals slightly more damage and KO damage than the Charged Brutal Upswing while allowing for a quick recovery animation cancel by charging, which allows you to get back to the action ASAP, or to respond to a clagger if one occurs immediately after the wakeup by going for a Charged Brutal Upswing into Strong Clutch. I'm working on a guide for this weapon, it genuinely plays like a dream for you and a nightmare for whatever's unfortunate enough to land itself a role as the Nail in this absolute bonkfest of a theater play.

 Anonymous
Turns a Monster Hunt, into a Boxing Match. While moving, your best attack is Lv2 Charge Uppercut, that is your counter/Opener/K.O Move. Just wait for your opening and slug em. Predicting where the monster's head will be while prepping a Charged Uppercut is key. If you pass the lv2 swing, either PowerCharge or Dodge and start pacing your swing again.

 Anonymous
Bonk Bonk Bonk Bonk Sexy powerful attack
Hammer in a nutshell
 Anonymous
Bonk Bonk Bonk Bonk Sexy powerful attack
Hammer in a nutshell
 Anonymous
 Anonymous
fun fact: Hammers are the only weapons that can cause 2 ailments in one hit

 Anonymous
 Anonymous
Just want to clarify here, that the Safi weapons don't start at 1612 raw. They need to be upgraded in order to reach that, they start out mid 1400's, and most people probably won't put five lvl 5 attack boosts on it.

 Anonymous
Iceborne has made Hammers better by adding the ability to immediately clutch-claw to a monster from either the two-charge Uppercut attack, or after landing from a cannon-ball spin. Make a note though, to be fully charged for that cannon-ball spin clutch-claw. If you’re not, you’ll grab the monster an be pulled in as normal. But if you’re at a level-3 charge, the cannon-ball spin will continue as you’re yanked onto whatever body part you grabbed. Yo-yo from hell, boys!

I swear, all hammer users are the stoners of this game. That's not even a insult, all hammer users I have met are really chill, relaxed guys.

 Anonymous
Is hammer just the most satisfying thing to use or am I missing something

 Anonymous
 Anonymous
Someone can clarify how it may happen, when you ride a monster, that after you exhaust them, and hit them in the head once, the hunter keep stay mounting, and you can attack the face again? I readedthat this happen if you charge the hammer only at level 2 charge the first time... but this didn't worked in my last attempts. Thanks

 Anonymous
Another advantage of the hammer is that the big bang chain does not interrupt other players. Excellent for pounding knock-downed monsters.
Cannonball Spin (is this the official name?) is by far the best move to make. Fast attack. Decent damage. And quick recover if apply roll after hitting ground.
Try to lure monsters near un-even plains. There is even a decoration called Slider that increases affinity right after a sliding ;)
Something worth mentioning; if you're charging an attack and run at certain textured walls, you'll run up the wall and do cannonball strike. You gain massive air, enough to mount pretty much any monster.

 Anonymous
Oh boy I sure do love me a good Ham. Talk about some good Hams in this game amirite. Ham spin cannonball special, ooooh boy thats some good stuff. Boy do I sure Love Hammin' a monster in the snoot. Ain't nuthin' better for Big Anja's congestion than a few Big Bangs to that nasty snooter. Keep Lovin', Keep Hammin', and keep lovin' to be Hammin'.





Hammer goes Bonk!
0
+10
-1