

Radobaan |
|
|---|---|
|
|
|
| Enemy Type | Large Monsters |
| Elements | None |
| Ailments | |
| Weakness | |
| Resistances | None |
| Locations | Rotten Vale |
| Tempered Lv. | 1 |

Radobaan is a Large Monster in Monster Hunter World (MHW).ラドバルキン in Japanese. Radobaan, a hulking and heavily-armored monster, traverses the wild landscapes with its spherical body encased in rock and bone. This massive creature is recognized for its robust defense mechanism, rolling into a formidable ball to charge at any threats. Radobaan's rocky exterior provides both protection and a formidable offense, allowing it to unleash devastating attacks upon its adversaries.
A gigantic brute wyvern that eats the bones of carcasses found in the Rotten Vale, using some of it as armor. It also rolls into a ball as a form of attack and transportation.
Radobaan Details & Locations
- Found in: Rotten Vale
- Target of Quests: Radobaan Roadblock, A Bone to Pick, Special Arena: Radobaan, Special Arena: HR Radobaan
- It won't attack hunters when it sees them unless they attack it first.
- Attacks other monsters: Odogaron
- Sizes: ♕ 1587.05 ~ ♕ 2200.23
- Species: Brute Wyverns
- HP:
- Low Rank: ~3,540 (Solo), ~4,800 (Duo), ~7,200(3 or 4 players)
- High Rank: ~5,700 (Solo), ~8,400 (Duo), ~12,540(3 or 4 players)
- Master Rank: ~18,300 (Solo), ~28,200 (Duo), ~42,090(3 or 4 players)
Radobaan Combat Info
- Elemental damages?
- Weak to
 Dragon and
 Ice damage
 - Susceptible to
 Blast Damage
 - Kinsect Extract:
- Red: Head, Neck, Head Bone
- Orange: Body, Back Bone, Tail
- White: Left Hindleg, Left Hindleg Bone, Right Hindleg, Right Hindleg Bone
- Players can break the head and spines on this monster
- Players can sever the tail of this monster
- Attack it as it rolls around to throw it off balance and knock it down.
- There is a small window of opportunity while it is rolling, during which any attack landed on the monster will result in a guaranteed knock-down.
- In order to know when you can attack it for a guaranteed knock-down, pay attention to its rolling animation. A couple seconds before it finishes its rolling sequence, it will start to slow down, and its body will start to wobble, and it will almost appear to be moving in slow motion. Attacking the monster while it is wobbling like this will cause it to lose its balance 100% of the time.
- Chunks of bone can be mined from its body after it has been knocked down.
- Shattering its bone armor is the key to winning a fight against this beast.
MHW Radobaan Attack and Moveset
Radobaan performs the following attacks:
- Rolling Charge: Radobaan curls into a ball and charges at hunters with impressive speed, attempting to trample them. Evading or using terrain effectively is necessary to avoid getting hit by this charging attack.
- Body Roll: Radobaan rolls its entire body, creating a shockwave upon impact. Evading the roll area is crucial to avoid taking damage and potential knockback.
- Rocky Slam: Radobaan lifts its body and slams it down, causing rocks to scatter in the surrounding area. Evading the slam area is essential to avoid taking damage and potential status effects.
- Backhop: Radobaan performs a quick backhop to reposition itself. Hunters need to be cautious of its movements to avoid being caught off guard.
- Tail Swipe: Radobaan swings its tail in a sweeping motion, creating a wide arc of attack. Timing dodges to avoid the tail swipe is crucial to prevent being knocked back or taking damage.
- Rocky Charge: Radobaan charges forward while covered in rocks, causing additional damage on impact. Evading or using terrain effectively is necessary to avoid getting hit by this charging attack.
- Rolling Spin: Radobaan curls into a ball and spins around, creating a whirlwind of rocks. Hunters need to stay clear of the spinning area to avoid taking damage.
- Rock Toss: Radobaan may lift rocks from the ground and toss them at hunters from a distance. Evading or blocking effectively is crucial to avoid getting hit by these projectiles.
- Enraged State: When enraged, Radobaan's attacks become more aggressive, and it may unleash a combination of its moves more frequently. Hunters need to stay vigilant and adapt to the increased intensity of the battle.
- Sleep Gas Release: Some variations of Radobaan can release sleep-inducing gas in the surrounding area. Hunters need to avoid the gas cloud to prevent falling asleep.
Radobaan Weaknesses
Each ⭐ star shown below represents more weakness to each ailment
| Ailment | |||||
|---|---|---|---|---|---|
| Weakness Level | ⭐⭐ | ⭐ | ⭐⭐ | ⭐⭐⭐ | ⭐⭐ |
Each ⭐ star shown below represents more weakness to each damage type
| Weak Point | |||
|---|---|---|---|
| Head (Breakable) | ⭐⭐⭐ | ⭐⭐⭐ | ⭐⭐⭐ |
| Legs (Breakable) | ⭐⭐ | ⭐⭐ | ⭐⭐ |
Detailed weakness information(Legend Explanation: here)
Master Rank:

Low & High Rank:

Credits to AsteriskAmpersand, Deathcream and MoonBunnie.
Radobaan Low and High Rank Carves
Defeating this monster allows the player to carve the following items:
Radobaan Carves
| Carves | Frequency |
| Radobaan Shell | ⭐⭐⭐⭐ |
| Radobaan Scale | ⭐⭐⭐⭐⭐ |
| Radobaan Oilshell (break head low rank, tail high rank) | ⭐⭐⭐⭐ |
| Radobaan Marrow (carve tail low rank) | ⭐⭐⭐ |
| Wyvern Gem (dropped, break legs, break back) | ⭐ |
| Radobaan Carapace | High Rank ⭐⭐⭐⭐ |
| Radobaan Scale + (dropped) | High Rank ⭐⭐⭐⭐⭐ |
| Radobaan Medulla | High Rank ⭐⭐⭐ |
| Master Rank ⭐⭐⭐⭐ | |
| Master Rank ⭐⭐⭐⭐⭐ | |
| Master Rank ⭐⭐⭐ | |
| Master Rank ⭐⭐⭐ | |
| Master Rank ⭐ | |
| Master Rank ⭐ | |
| Master Rank ⭐⭐ |
Radobaan Rewards
| Rewards | Frequency |
| Radobaan Shell | ⭐⭐⭐⭐ |
| Radobaan Scale | ⭐⭐⭐⭐ |
| Radobaan Oilshell | ⭐⭐⭐ |
| Radobaan Marrow | ⭐⭐⭐ |
| Monster Bone L | ⭐⭐⭐ |
| Sleep Sac | ⭐⭐⭐ |
| Radobaan Carapace | High Rank ⭐⭐⭐⭐ |
| Radobaan Scale + | High Rank ⭐⭐⭐⭐ |
| Radobaan Medulla | High Rank ⭐⭐⭐ |
| Monster Keenbone | High Rank ⭐⭐⭐ |
| Coma Sac | High Rank ⭐⭐⭐ |
| Wyvern Gem | High Rank ⭐ |
| Master Rank ⭐⭐⭐⭐ | |
| Master Rank ⭐⭐⭐⭐ | |
| Master Rank ⭐⭐⭐ | |
| Master Rank ⭐⭐⭐ | |
| Master Rank ⭐⭐⭐⭐ | |
| Master Rank ⭐ | |
| Master Rank ⭐⭐⭐⭐⭐ | |
| Master Rank ⭐⭐⭐⭐ | |
| Master Rank ⭐⭐⭐ | |
| Master Rank ⭐⭐⭐⭐ | |
| Master Rank ⭐⭐⭐ |
Radobaan Weapons & Armor
Armor and Weapons related to the Radobaan Monster.
Weapons
 Radobaan Grindblade I
 Radobaan Grindblade II
 Radobaan Osseus I
 Radobaan Osseus II
 Baan Gavel I
 Baan Gavel II
 Baan Rattle I
 Baan Rattle II
 Baan Bazooka I
 Baan Bazooka II
Armor
 Baan Armor Set
Set Bonus: None
Baan Alpha Armor Set(α)
Set Bonus: None
Baan Beta Armor Set (β)
Set Bonus: None


Notes, Trivia, & Media
- These monsters are from the Brute Wyvern species
- These monsters are ??? big
- Can be lured with ??
- Camouflage works until ?? range
- Radobaan is a detritivore, as it eats bones.
- Radobaan is known as the "Bone Hammer Wyvern"
- First introduced to the franchise in Monster Hunter World.
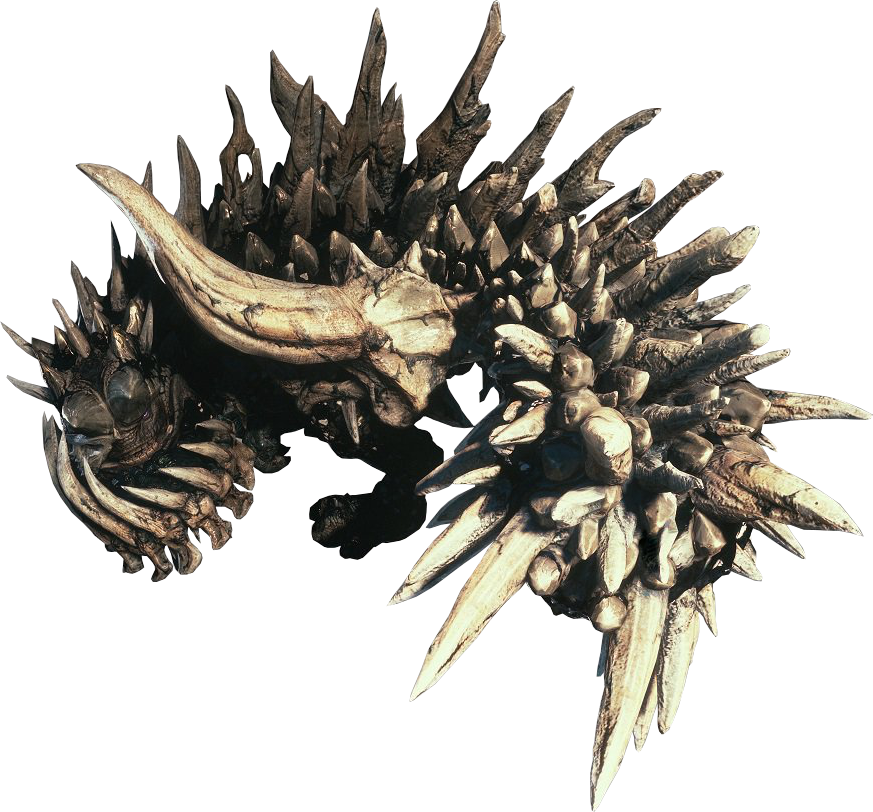
-
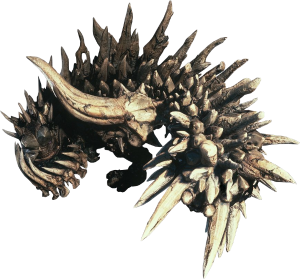 Radobaan render.
-
 Radobaan icon.
| Large Monsters |
Acidic Glavenus ♦ Alatreon ♦ Ancient Leshen ♦ Anjanath ♦ Azure Rathalos ♦ Banbaro ♦ Barioth ♦ Barroth ♦ Bazelgeuse ♦ Behemoth ♦ Beotodus ♦ Black Diablos ♦ Blackveil Vaal Hazak ♦ Brachydios ♦ Brute Tigrex ♦ Coral Pukei-Pukei ♦ Deviljho ♦ Diablos ♦ Dodogama ♦ Ebony Odogaron ♦ Fatalis ♦ Frostfang Barioth ♦ Fulgur Anjanath ♦ Furious Rajang ♦ Glavenus ♦ Gold Rathian ♦ Great Girros ♦ Great Jagras ♦ Jyuratodus ♦ Kirin ♦ Kulu-Ya-Ku ♦ Kulve Taroth ♦ Kushala Daora ♦ Lavasioth ♦ Legiana ♦ Leshen ♦ Lunastra ♦ Namielle ♦ Nargacuga ♦ Nergigante ♦ Nightshade Paolumu ♦ Odogaron ♦ Paolumu ♦ Pink Rathian ♦ Pukei-Pukei ♦ Raging Brachydios ♦ Rajang ♦ Rathalos ♦ Rathian ♦ Ruiner Nergigante ♦ Safi'jiiva ♦ Savage Deviljho ♦ Scarred Yian Garuga ♦ Seething Bazelgeuse ♦ Shara Ishvalda ♦ Shrieking Legiana ♦ Silver Rathalos ♦ Stygian Zinogre ♦ Teostra ♦ Tigrex ♦ Tobi-Kadachi ♦ Tzitzi-Ya-Ku ♦ Uragaan ♦ Vaal Hazak ♦ Velkhana ♦ Viper Tobi-Kadachi ♦ Xeno'jiiva ♦ Yian Garuga ♦ Zinogre ♦ Zorah Magdaros |
 Anonymous
He always sits on me and hits with sleeping gas andhe just waits for effects run out and do it again and just spam it
- Anonymous
Bro Radobaan without the boon spikes on its bottom jaw just looks like a spikey uragaan.
- Anonymous
Devs: How many spikes should we put on this monster?
Boss: Yes
- Anonymous
I love fighting Mr. rolly polly Baan, i main the lance so it gets annoying when all my attacks just bounce off of him till the armor breaks but i just love it! Seeing him curl up and roll at me just to nope powerblock his a§§ like: "I AM THE WALL!"
- Anonymous
this guys the reasons I thank god I have a destroyer jewel 2
- Anonymous
Any mentions of it being related to Uragaan in game? Radobaan and Uragaan seem like nearly the same species, just adapted differently to their respective environments.
- Anonymous
"Chunks of bone can be mined from its body after it has been knocked down." 40+ radobaan hunts and I never knew of it.
- Anonymous
He to ez. He sad excuse for a monster with heavy bowgun I broke all his body parts with sticky ammo and wyvern ammo not even worth a piss.
- Anonymous
- Anonymous
- Anonymous
It's the BONER MAN he gives you so much calcium that you choke on it
- Anonymous
Basically a giant dog bone, also did you know that the horns on its legs are diablos horns?
- Anonymous
- Anonymous
Radobaan deserves some more love.... he’s pretty cool too...
- Anonymous
I’m willing to bet that if MR armor-sets become layered, heavy bowgun mains are just gonna cosplay the absolute hell out of Doomguy... litterally...
- Anonymous
- Anonymous
I just noticed that he SONIC ROLLS, so when I kill him I say... TAKE THAT YOU SONIC THE HEDGEHOG WANNABE
- Anonymous
- Anonymous
This guy is fun to fight, but can pretty much die from anything. I use a great sword and have found that you should (with pretty much any monster) focus on cutting off the tail. His lack of backwards attacks makes this pathetically easy. Then just play monster hunter world until he's dead.
- Anonymous
The best way I know how to bully the radoban is to just use sticky ammo with the LBG. easiest fight ever
- Anonymous
Using pulsar rod 2 never fought this thing yet is it easy or hard with insect glaive
- Anonymous
- Anonymous
fought him once... broke a lot of parts his parts cut his tail, etc..... he s almost naked then in a certain area while we fight i see him bath in the bones go a little underground and emerge as if i didn t break anything.... his tail was as if i never cut it, he got bones to his face, horns at his legs... i was really scared ... i tough i had to redo everything... then after 2-3 hit i see the skeleton icon on the minimap and capture him.
- Anonymous
- Anonymous
- Anonymous
If he starts tumbling, not rolling, hit him. If anything hits him at that point, even if it’s a rock from your slinger, he’ll fall over and go through the tripped animation.
- Anonymous
I tried to Capture it, I waited until he was sleeping placed a trap and hit it with 2 tranqs but it didnt capture him.. Does his face armor have to be removed first? He had just replaced all his armor in the area prior to limping... Anyone have any tips for capturing him ?
- Anonymous
set mega barrel bomb and mines from light bowgun on rolling path.... kaboom!!! b*tch!
- Anonymous
Why isn’t it mentioned that it looks JUST LIKE URAGAAN? Come on, people!
i tied flash podding it twice but it didnt work. do i need to break the bones on its face for the pods to work or is it immune?
- Anonymous
If you’re looking for the easiest fight in the game, just bring the blazing bow and smash the arrow volley and raining rocks. This will literally take out his armor in seconds and if you’re good at aiming it he will be knocked out for half the fight.
- Anonymous
This thing left the locale in the story expedition and I was like 0_0 well what now
- Anonymous
This guy is sooo much fun to fight as a LBG user. You just set your mines down and he runs over them with no hesitation. He practically kills himself while breaking his own armor for you. Toss on some sticky rounds for more explosions and fire piercing rounds till he runs away limping, then drop a trap down and pump 2 traq rounds into this numbskull and call it a hunt.
- Anonymous
Um, I'm a Switch axe user, and I'm not really sure about taking it down. How can I make it easier for me? Do I upgrade my axe? Do I change my Weapon?
- Anonymous
dragonbone glaive and you're done in seconds... honestly, this thing really is the least you have to worry about in the rotten vale, I have more trouble taking down a jyuratodus, that's how easy this is XD
- Anonymous
- Anonymous
Easy to kill but hard to get sleep sac for some reason is there a certain part i have to break or something?
- Anonymous
Found it was laughably easy with a bow and charge 3 dragon piercer. It falls over all the time when you shoot it with low power shots during its roll attack. Then just line up from tail to front, charge and Dragon Piercer. After a few shots he will have lost all his spikes. Easy to trap at low rank anyway. Took a bit longer to kill though.
- Anonymous
This dude is extremely easy with insect glaive just keep bouncing until all his bone armor breaks.
- Anonymous
- Anonymous
Had to double back to trigger his cutscene, be prepared for a long fight also if you use the charge blade. Took me almost an hour of wailing on him, even slicing his tail off before he went down.
- Anonymous
- Anonymous
what do you do to get Dragonbone Relics off of this monster?
- Anonymous
Why aren't Wyvern Bonemass and Large Wyvern Bonemass listed as drops?
0
+10
-1